If you are wondering why you would even want to integrate rust into an iOS project there are multiple good reasons, but the two reasons why I choose to do so is because it allows me to share a common code base between an iOS app and an Android app. The second reason is because it allows me to write the core of the app and the business logic in rust, which is by far my favorite programming language. So if I can rather write the core of the app once in my favorite language instead of an implementation for iOS and Android in their own respective languages, I'd much rather do that.
Now, to understand how we can successfully integrate rust into a mobile app we need some prerequisite knowledge. This post will only go into details about how to integrate rust into an iOS project, but the basics are the same for iOS projects as well an Android ones. I will make a post in the future about how to integrate the same rust library into an Android project. Since rust is a systems programming language like C/C++, we can compile it down to binaries that can run on bare metal without having to port a garbage collector or anything, the only thing that's needed for portability is the standard library, and fortunately both the iOS and Android architectures are ported. Both Android and iOS projects have the abilities to connect to and use binary libraries through what's called an FFI. The FFI or rather foreign function interface, allows one programming language to call the functions of another language, that's the basics of it. There are many different and specialized ways of doing this, but one of the most common ways is to acts as if every binary was written in C with C types. This means that a basic example of interfacing rust code with swift in an iOS project is by compiling the rust library down to a static library file, and then making a C header file that Xcode can use to interface with the static library file. The header file will include the names of the functions, their parameters and what they will return. With this, Xcode can translate swift types into C types and run C compatible functions. Both swift and kotlin are made with C style FFI in mind, and was therefore designed to be able to translate their types into C compatible ones. A basic tutorial on how to do exactly this with rust to iOS is this YouTube video. Unfortunately this video is a bit old and outdated, and is no longer the best method for integrating rust into mobile apps. The new way to make rust libraries that interface with different languages is by using UniFFI.
UniFFI is as it says in its guide "a tool that automatically generates foreign-language bindings targeting Rust libraries". So with some configs, scripts and a little bit of black magic, UniFFI can not only provide C binding from rust to swift and kotlin, but make safe interfaces for the library in swift, kotlin and more! This means that instead of trying to call the raw rust library functions from swift or kotlin, you will call the interface functions, who can then handle conversions of more advanced types and structs, but also handle errors in a safe way as long as you keep them in mind.
Before we get into the weeds of actually making a little rust library and integrating it into an iOS project, you will first have to read through the UniFFI documentation from 1 to 4 and 7 to 10. This is just so you have some understanding of what is going on from here on out. Unfortunately, since Apple released the Apple Silicon architecture with the M1 SoC, it is not as easy to integrate binary libraries into iOS projects. The new way to do things is mainly what this post will go over. Now to some actual coding!
Make the library
First you will have to add the iOS architectures to the rust compiler. Run these commands to add them with the rustup command.
Shell
λ rustup target add aarch64-apple-ios # for iOS
λ rustup target add x86_64-apple-ios # for Intel Mac simulators
λ rustup target add aarch64-apple-ios-sim # for M1 Mac simulators
Then you have to make a new rust library. It doesn't have to located anywhere near the iOS project itself, because we will only reference the library source files with it's absolute path later in Xcode.
Then run this to set up a new library for UniFFI.
Shell
λ cargo new --lib example
λ cargo add --build uniffi --features build
λ cargo add uniffi --features cli
Then go into Cargo.toml and add these lines.
Toml
Cargo.toml
[lib]
crate-type = [ "staticlib" ]
name = "example"

[[bin]]
name = "uniffi-bindgen"
path = "uniffi-bindgen.rs"
Then make the file build.rs and add these lines. This is the build file that will point to the right .udl file when the library is compiled. Note that the file at the path "./src/example.udl" doesn't exist yet, but we will make it soon.
Rust
build.rs
fn main() {
    uniffi::generate_scaffolding("./src/example.udl").unwrap();
}
Then make the file uniffi-bindgen.rs and add these lines. This is the "binary" that will generate the binding when we run the cargo run --bin uniffi-bindgen command later.
Rust
uniffi-bindgen.rs
fn main() {
    uniffi::uniffi_bindgen_main()
}
We can now actually begin writing some rust library code. In the lib.rs file we add this code.
Rust
lib.rs
uniffi::include_scaffolding!("example"); // "example" is the name of the .udl file

fn add(a: u32, b: u32) -> u32 {
    a + b
}

fn hello() -> String {
    "This is a hello from the rust library".to_string()
}
We will now make the example.udl file that we have thus far referenced twice, in the lib.rs and build.rs files. If you read the documentation you will remember that the .udl files are basically the UniFFI version of a header file. Here we will define what types the functions are with UniFFI types. You can find a type comparison chart here.
UDL
example.udl
namespace example {
  u32 add(u32 a, u32 b);
  string hello();
};
I can also recommend adding these lines to your .gitignore file in the rust library.
.gitignore
.gitignore
/include

/Example.xcframework/ios-arm64/Example.framework/*
/Example.xcframework/ios-arm64/Example.framework/Headers/*
!/Example.xcframework/ios-arm64/Example.framework/Info.plist
!/Example.xcframework/ios-arm64/Example.framework/Modules
!/Example.xcframework/ios-arm64/Example.framework/Headers
!/Example.xcframework/ios-arm64/Example.framework/Headers/exampleFFI.h

/Example.xcframework/ios-arm64_x86_64-simulator/Example.framework/*
/Example.xcframework/ios-arm64_x86_64-simulator/Example.framework/Headers/*
!/Example.xcframework/ios-arm64_x86_64-simulator/Example.framework/Info.plist
!/Example.xcframework/ios-arm64_x86_64-simulator/Example.framework/Modules
!/Example.xcframework/ios-arm64_x86_64-simulator/Example.framework/Headers
!/Example.xcframework/ios-arm64_x86_64-simulator/Example.framework/Headers/exampleFFI.h
The last thing that's needed in the rust library folder is the folder structure Apple requires for it's "new" fat library and helper folders.
These are called XCFrameworks, and they basically are a folder with sub folders for each binary architecture as well as some configuration files to tell Xcode what folder contains what binary.
First make a folder in the root or your rust library folder with the name "Example.xcframework". By the way, the name "example" that is used throughout this whole tutorial is meant to be replaced by a more relevant name for your project. If the code name for your project is "blueberry", then a fitting name for the .udl file would naturally be "blueberry.udl", whist the final .xcframework and swift library interface could be named "BlueberryCore.xcframework" and "BlueberryLib.swift" respectively.
Now to complete the XCFrameworks structure. Once you have made your "Example.xcframework" in the root of your rust library, add two new folders inside the XCFrameworks folder with the names "ios-arm64" and "ios-arm64_x86_64-simulator". Then you add the folder "Example.framework" inside both the "ios-arm64" and "ios-arm64_x86_64-simulator" folders. Now you have to create the folders "Headers" and "Modules" inside both the "Example.framework" folders. Once this is done you make the file "Info.plist" and add these lines. This file should be placed inside both the "Example.framework" folers.
Plist
Info.plist
<?xml version="1.0" encoding="UTF-8"?>
<!DOCTYPE plist PUBLIC "-//Apple//DTD PLIST 1.0//EN" "http://www.apple.com/DTDs/PropertyList-1.0.dtd">
<plist version="1.0">
    <dict>
        <key>CFBundleDevelopmentRegion</key>
        <string>en</string>
        <key>CFBundleExecutable</key>
        <string>Example</string>
        <key>CFBundleIdentifier</key>
        <string>com.user.Example</string>
        <key>CFBundleInfoDictionaryVersion</key>
        <string>6.0</string>
        <key>CFBundleName</key>
        <string>Example</string>
        <key>CFBundlePackageType</key>
        <string>FMWK</string>
        <key>CFBundleShortVersionString</key>
        <string>1.0</string>
        <key>CFBundleVersion</key>
        <string>0.0.1</string>
        <key>NSPrincipalClass</key>
        <string></string>
    </dict>
</plist>
You should replace the values "CFBundleExecutable" and "CFBundleName" with your library name, and "CFBundleIdentifier" with your identifier.
Once that is done you can make the "Info.plist" file for the root of the "Example.xcframework" folder. It should have these lines.
Plist
<?xml version="1.0" encoding="UTF-8"?>
<!DOCTYPE plist PUBLIC "-//Apple//DTD PLIST 1.0//EN" "http://www.apple.com/DTDs/PropertyList-1.0.dtd">
<plist version="1.0">
    <dict>
        <key>AvailableLibraries</key>
        <array>
            <dict>
                <key>LibraryIdentifier</key>
                <string>ios-arm64</string>
                <key>LibraryPath</key>
                <string>Example.framework</string>
                <key>SupportedArchitectures</key>
                <array>
                    <string>arm64</string>
                </array>
                <key>SupportedPlatform</key>
                <string>ios</string>
            </dict>
            <dict>
                <key>LibraryIdentifier</key>
                <string>ios-arm64_x86_64-simulator</string>
                <key>LibraryPath</key>
                <string>Example.framework</string>
                <key>SupportedArchitectures</key>
                <array>
                    <string>arm64</string>
                    <string>x86_64</string>
                </array>
                <key>SupportedPlatform</key>
                <string>ios</string>
                <key>SupportedPlatformVariant</key>
                <string>simulator</string>
            </dict>
        </array>
        <key>CFBundlePackageType</key>
        <string>XFWK</string>
        <key>XCFrameworkFormatVersion</key>
        <string>1.0</string>
    </dict>
</plist>
Then inside both the "Modules" folders, add the file "module.modulemap". The modulemap should have these lines.
Modulemap
module.modulemap
framework module Example {
  umbrella header "Example.h"

  export *
  module * { export * }
}
Then inside both the "Headers" folders, add the file "Export.h". The file should have these lines.
Header
Export.h
#include "exampleFFI.h"The "exampleFFI.h" file is equal to whatever the .udl file is called plus the "FFI.h" ending. This file will be automatically generated when compiling.
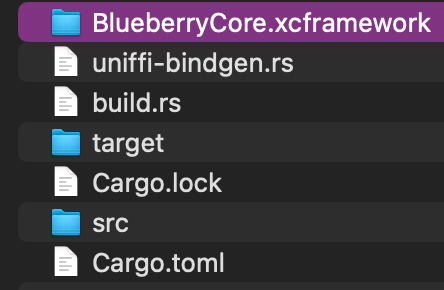
The final folder structure you should have should be something like this.
Example.xcframework
├── ios-arm64
│   └── Example.framework
│       ├── Headers
│       │   └── exampleFFI.h
│       ├── Modules
│       │   └── module.modulemap
│       └── Info.plist
├── ios-arm64_x86_64-simulator
│   └── Example.framework
│       ├── Headers
│       │   └── exampleFFI.h
│       ├── Modules
│       │   └── module.modulemap
│       └── Info.plist
└── Info.plist
Xcode
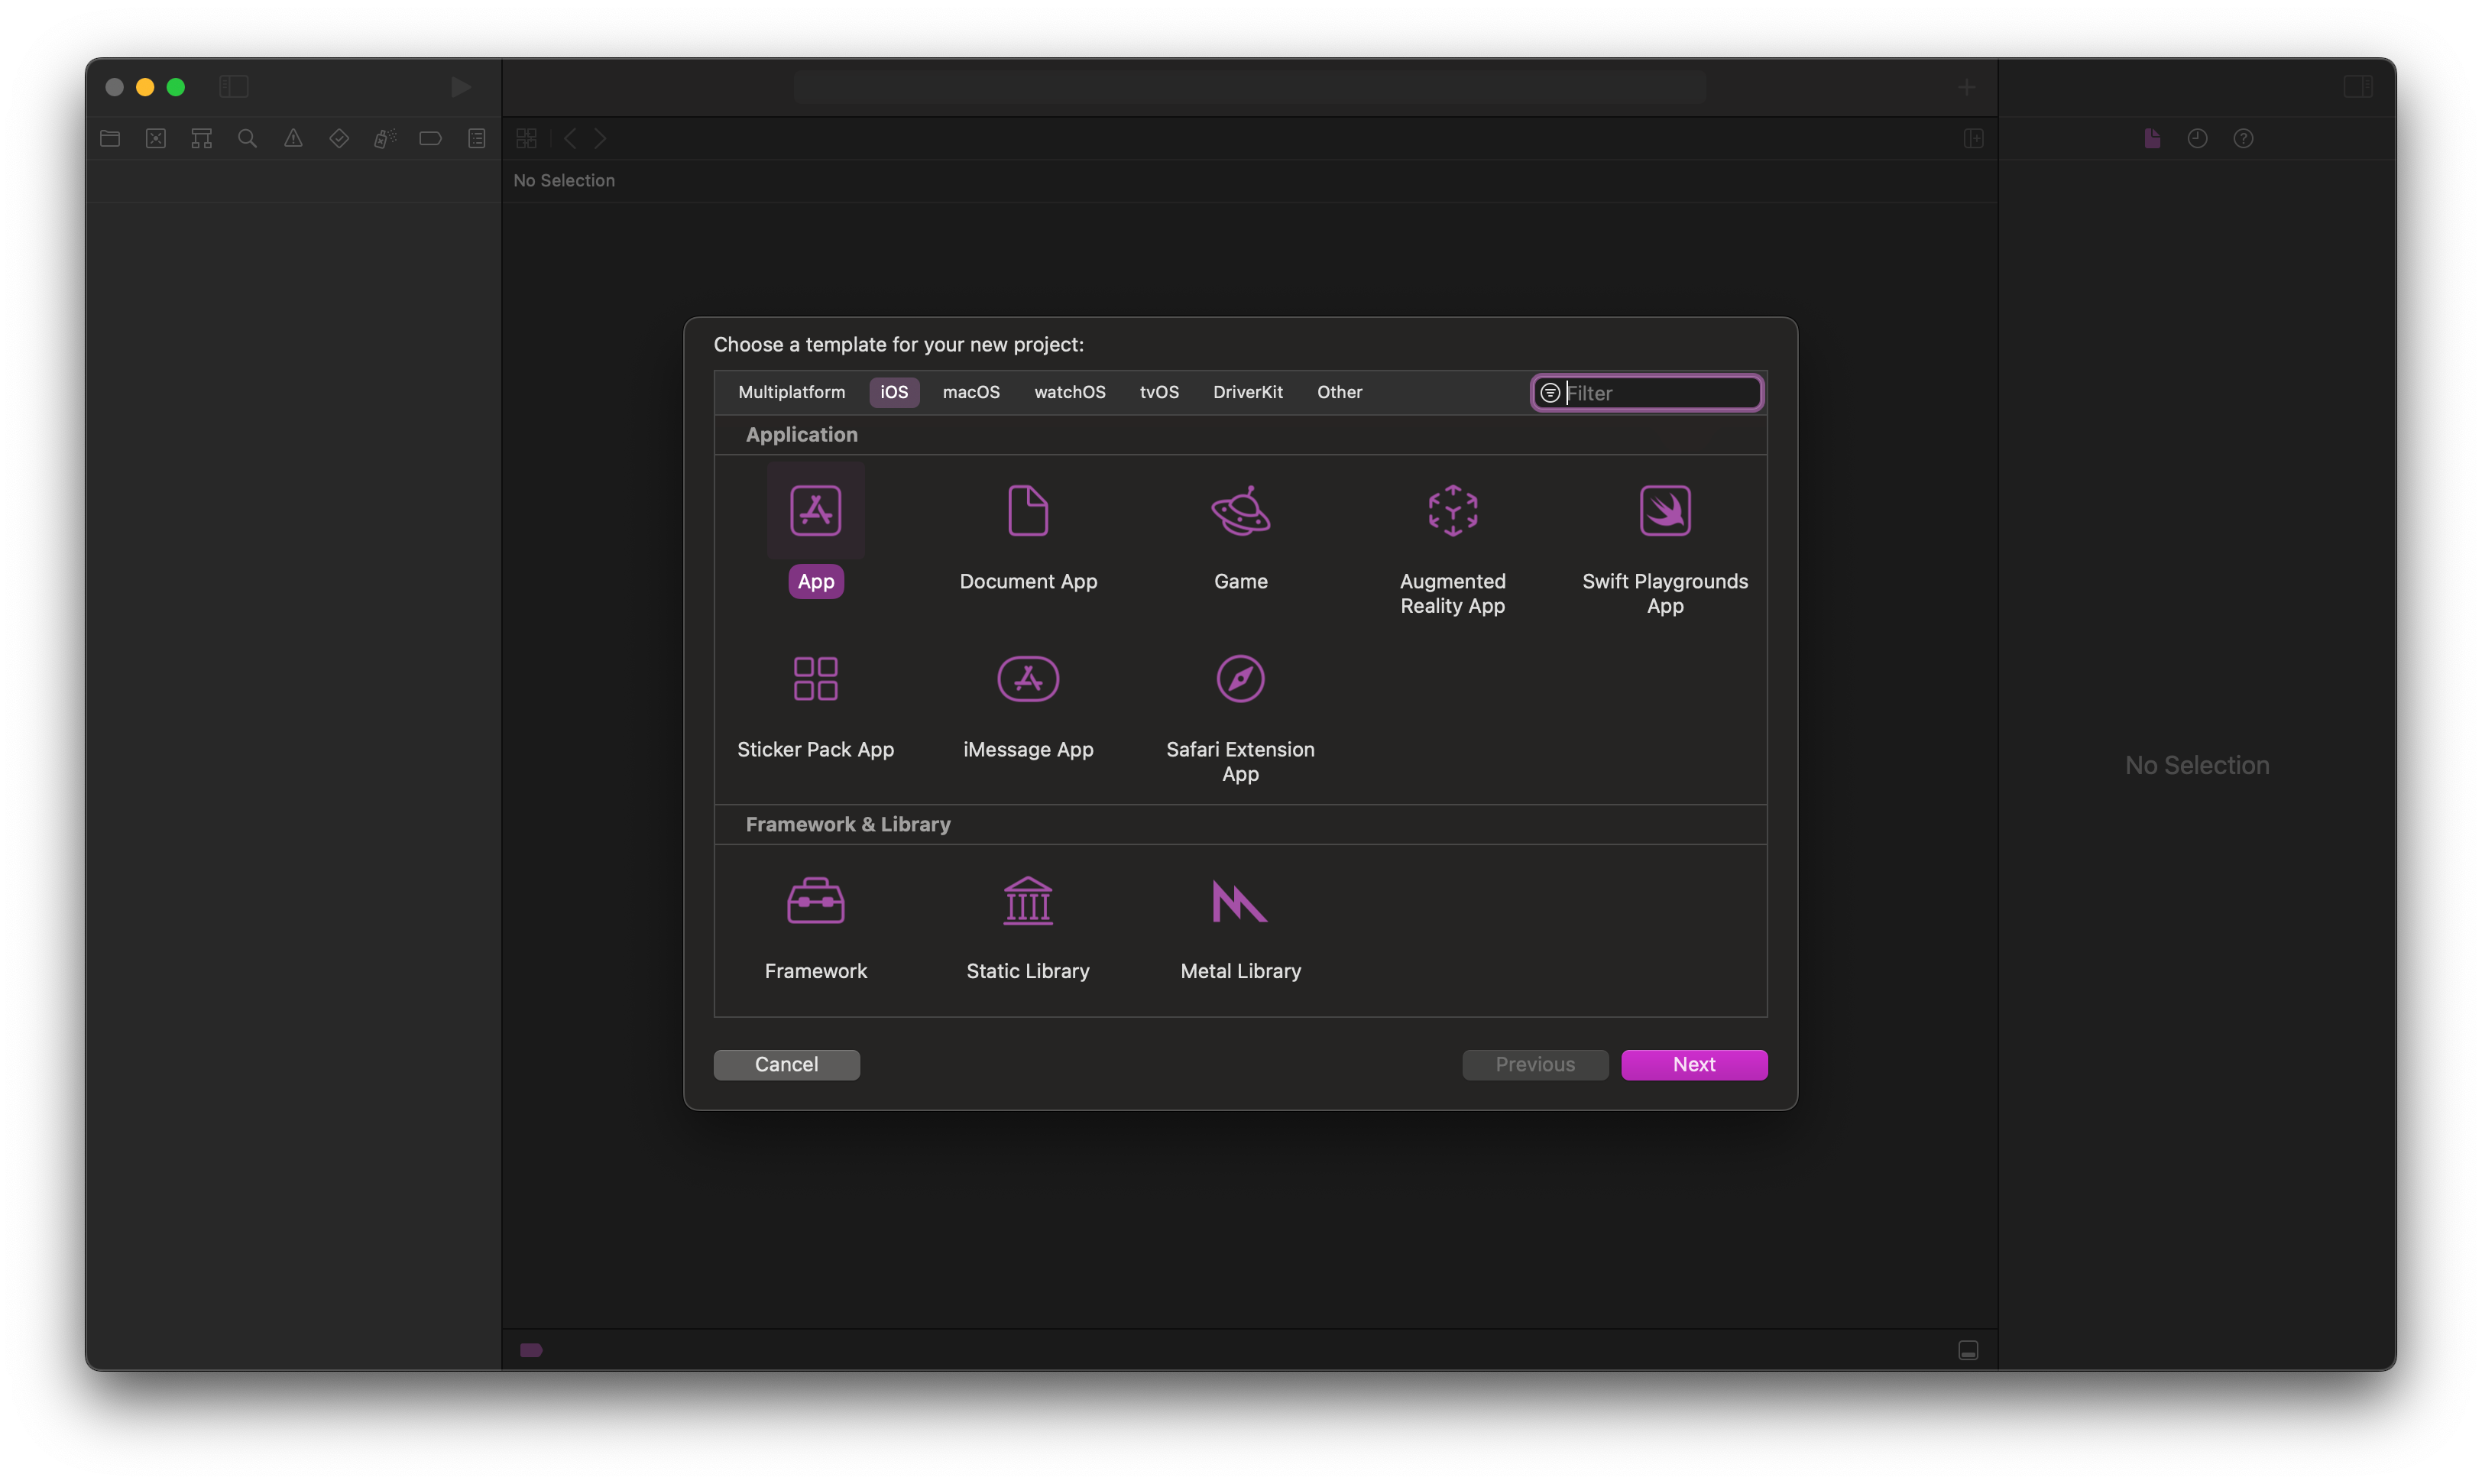
Now we can finally get to the Xcode integration! First make a new SwiftUI iOS app project (or you can add your library to an existing project).
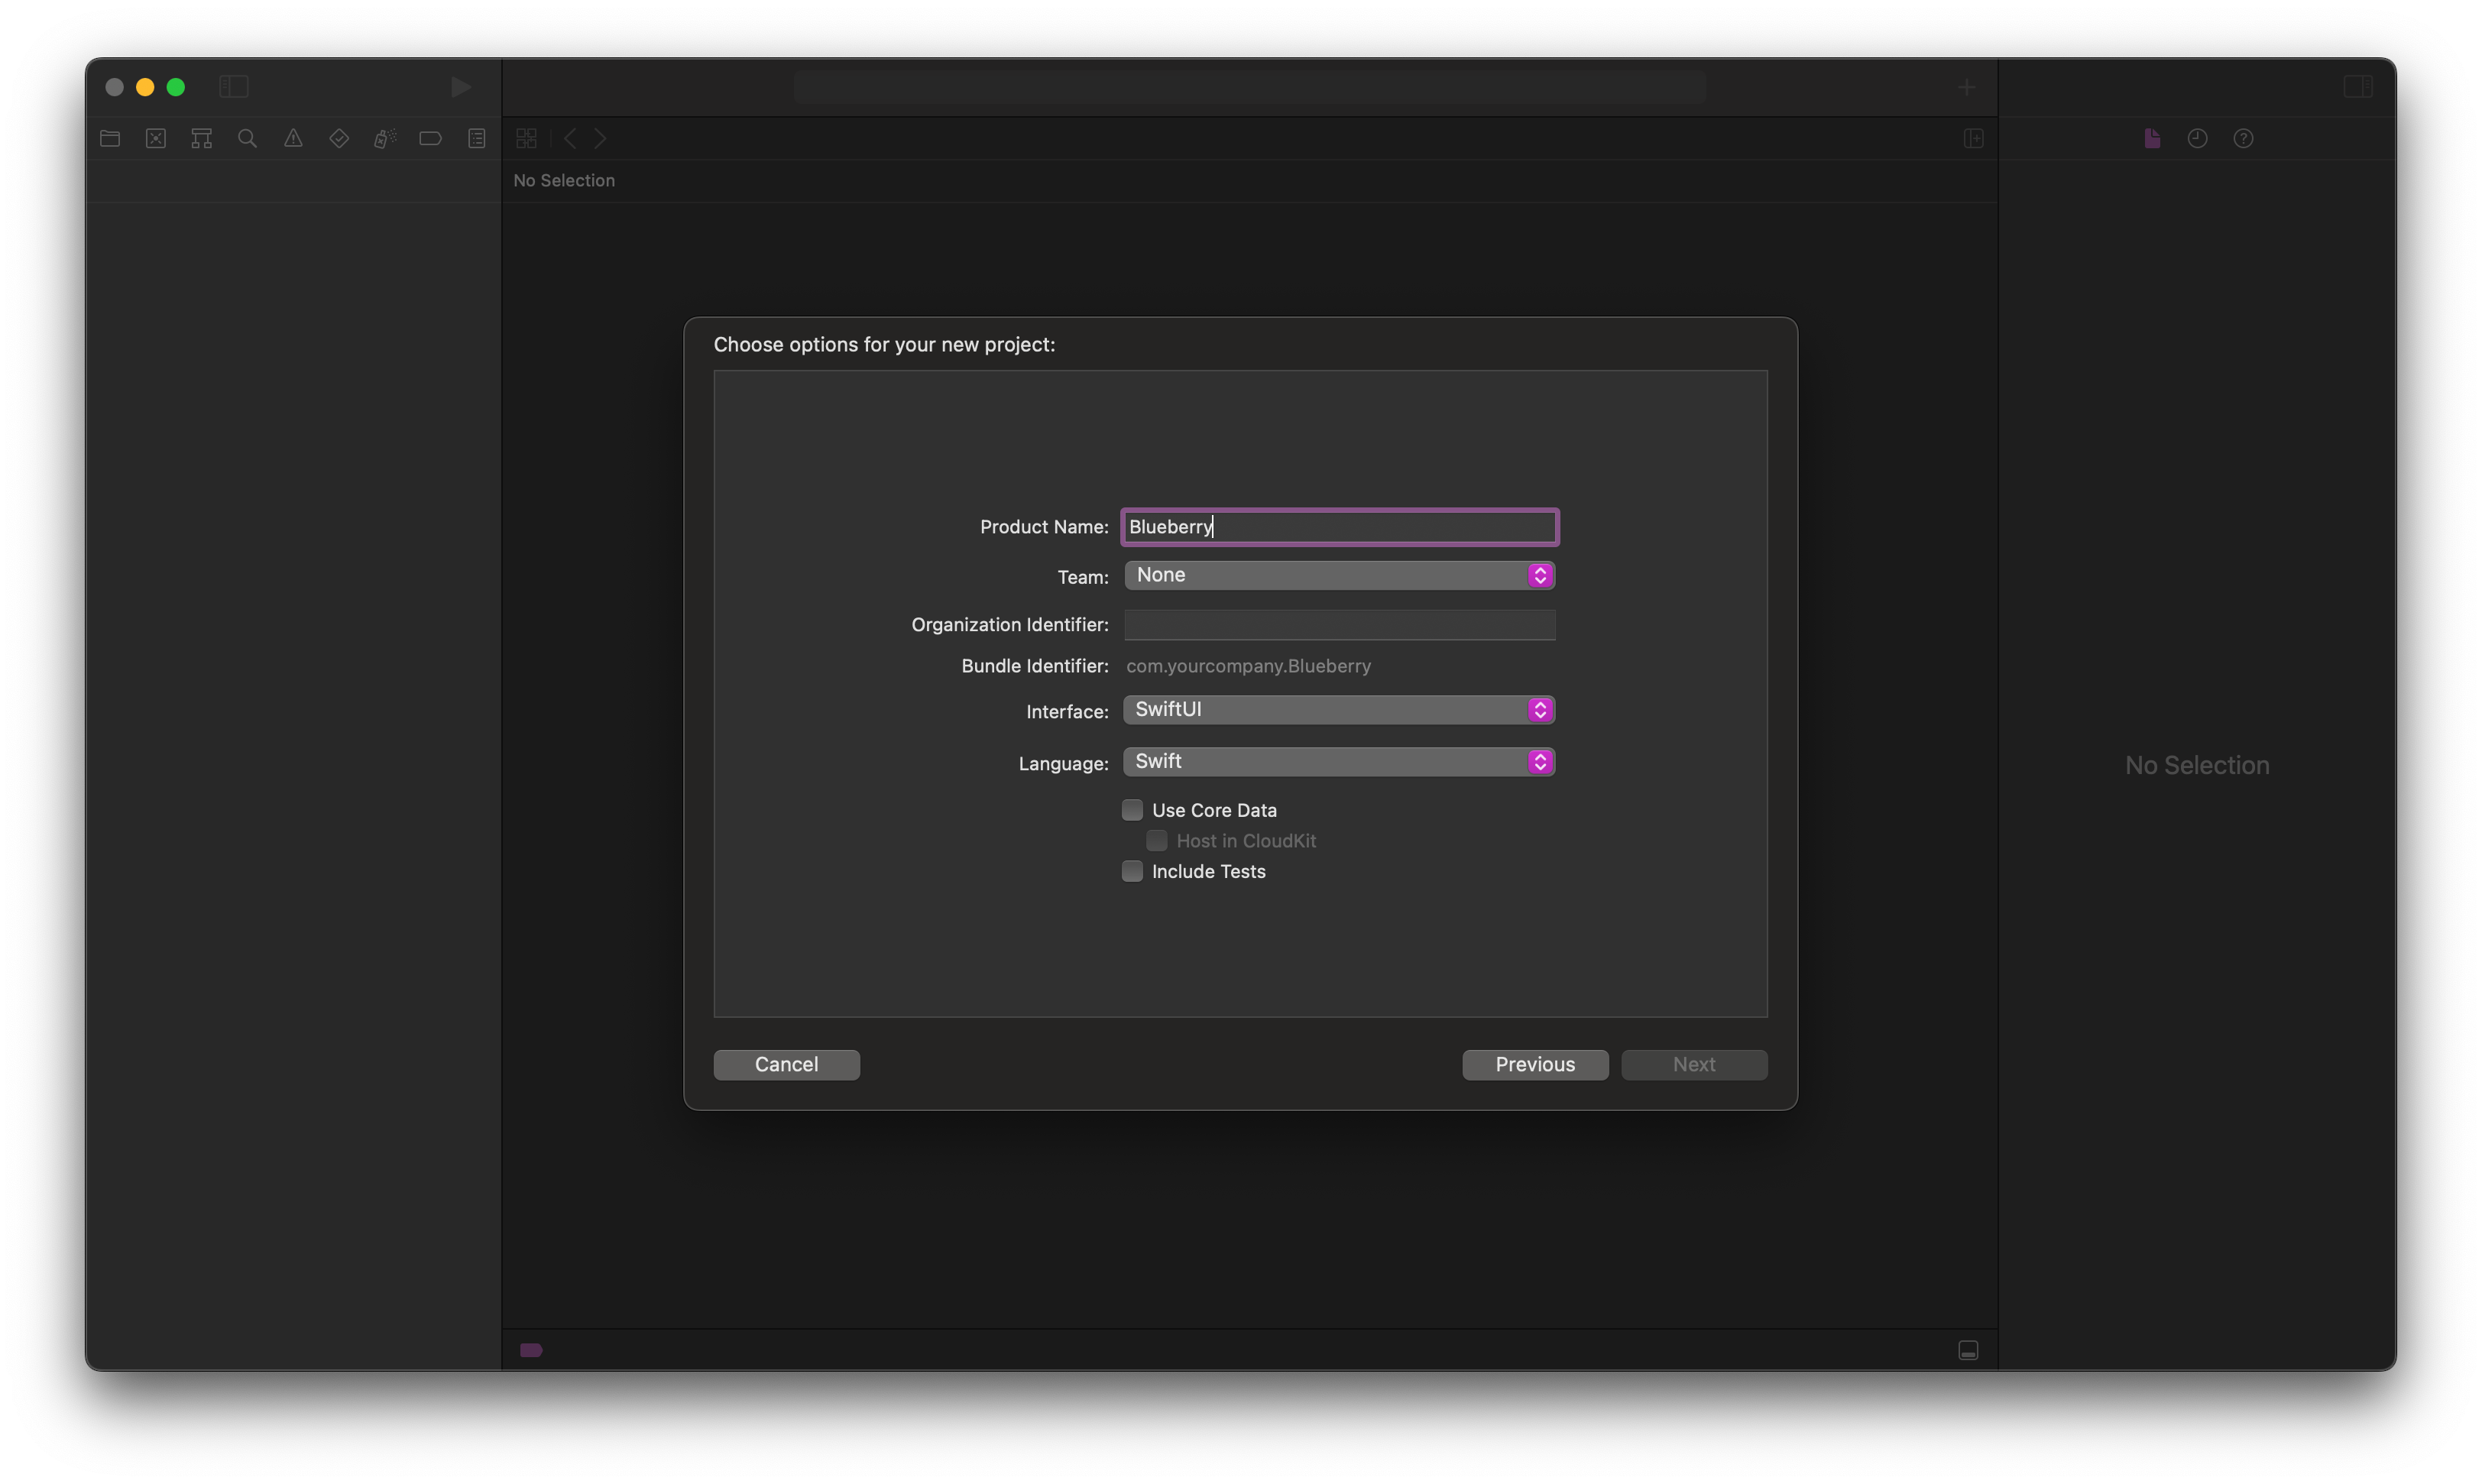
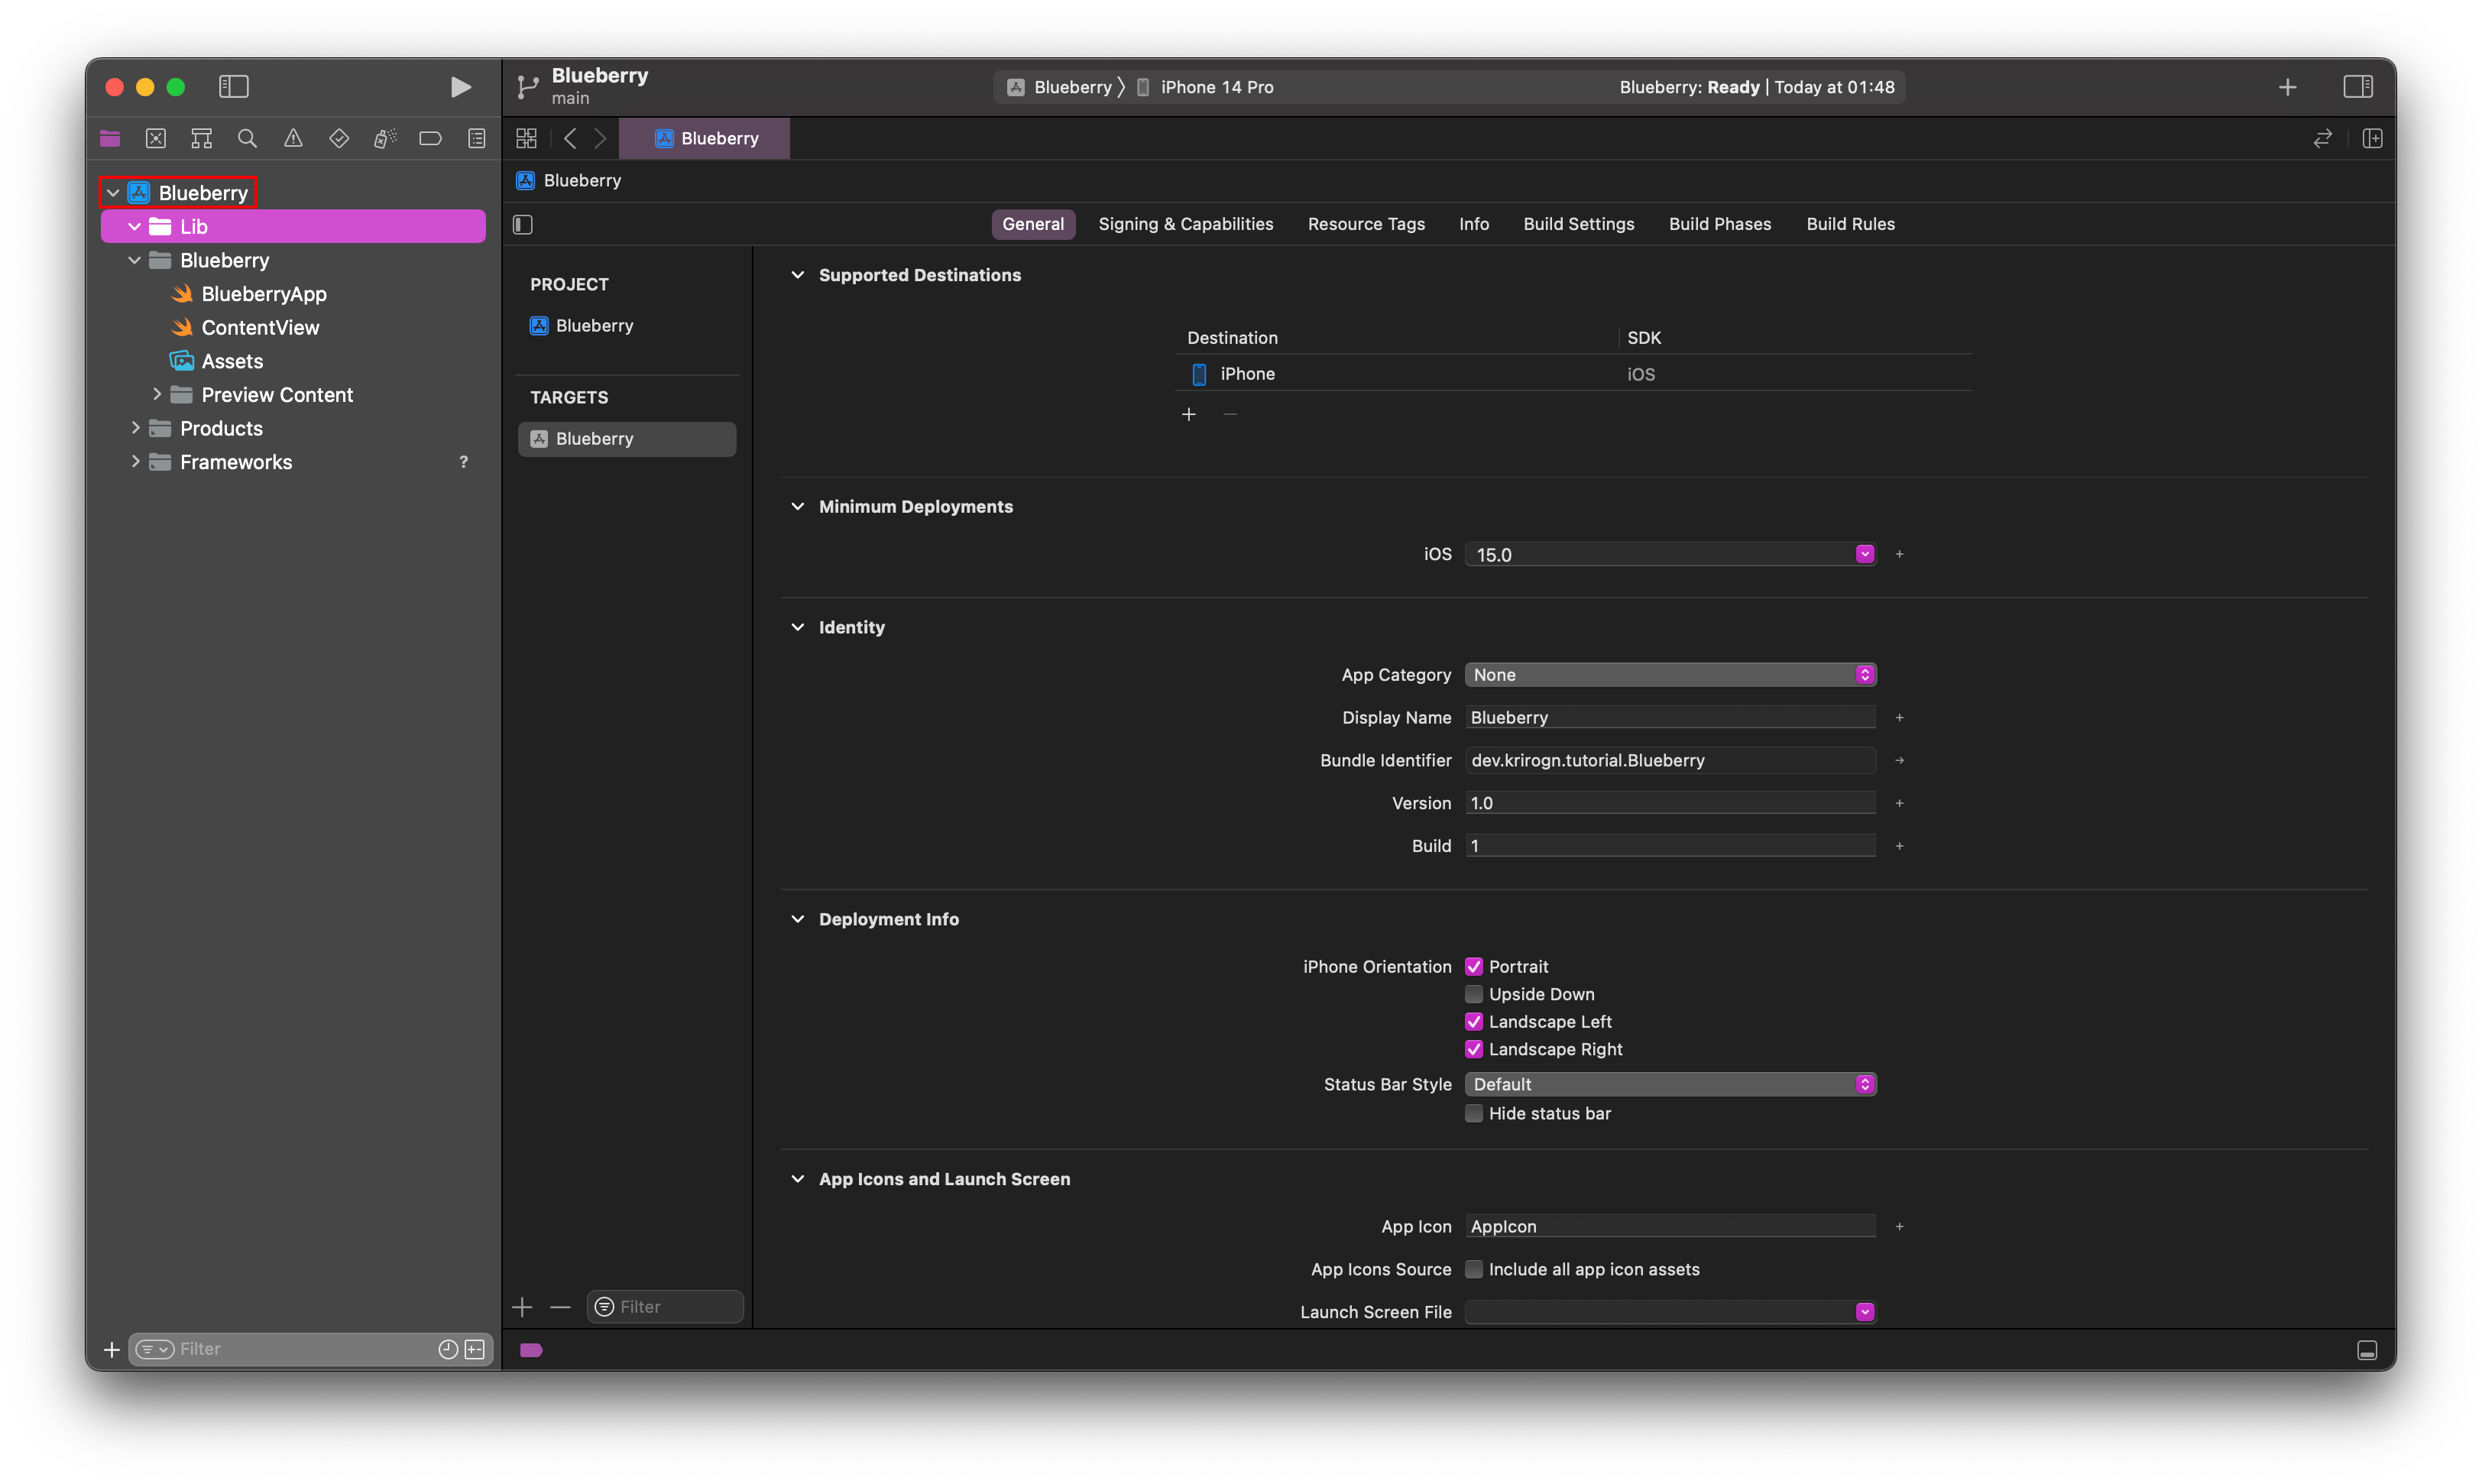
In this example i chose to name my iOS project Blueberry and my rust library BlueberryCore. P.S. remember to sign the iOS project with a team, and give it an identifier that isn't the same as the one you gave the XCFrameworks in its "Info.plist".

Then remove all non iOS targets since we haven't compiled binaries for them and choose the iOS version you want to support.
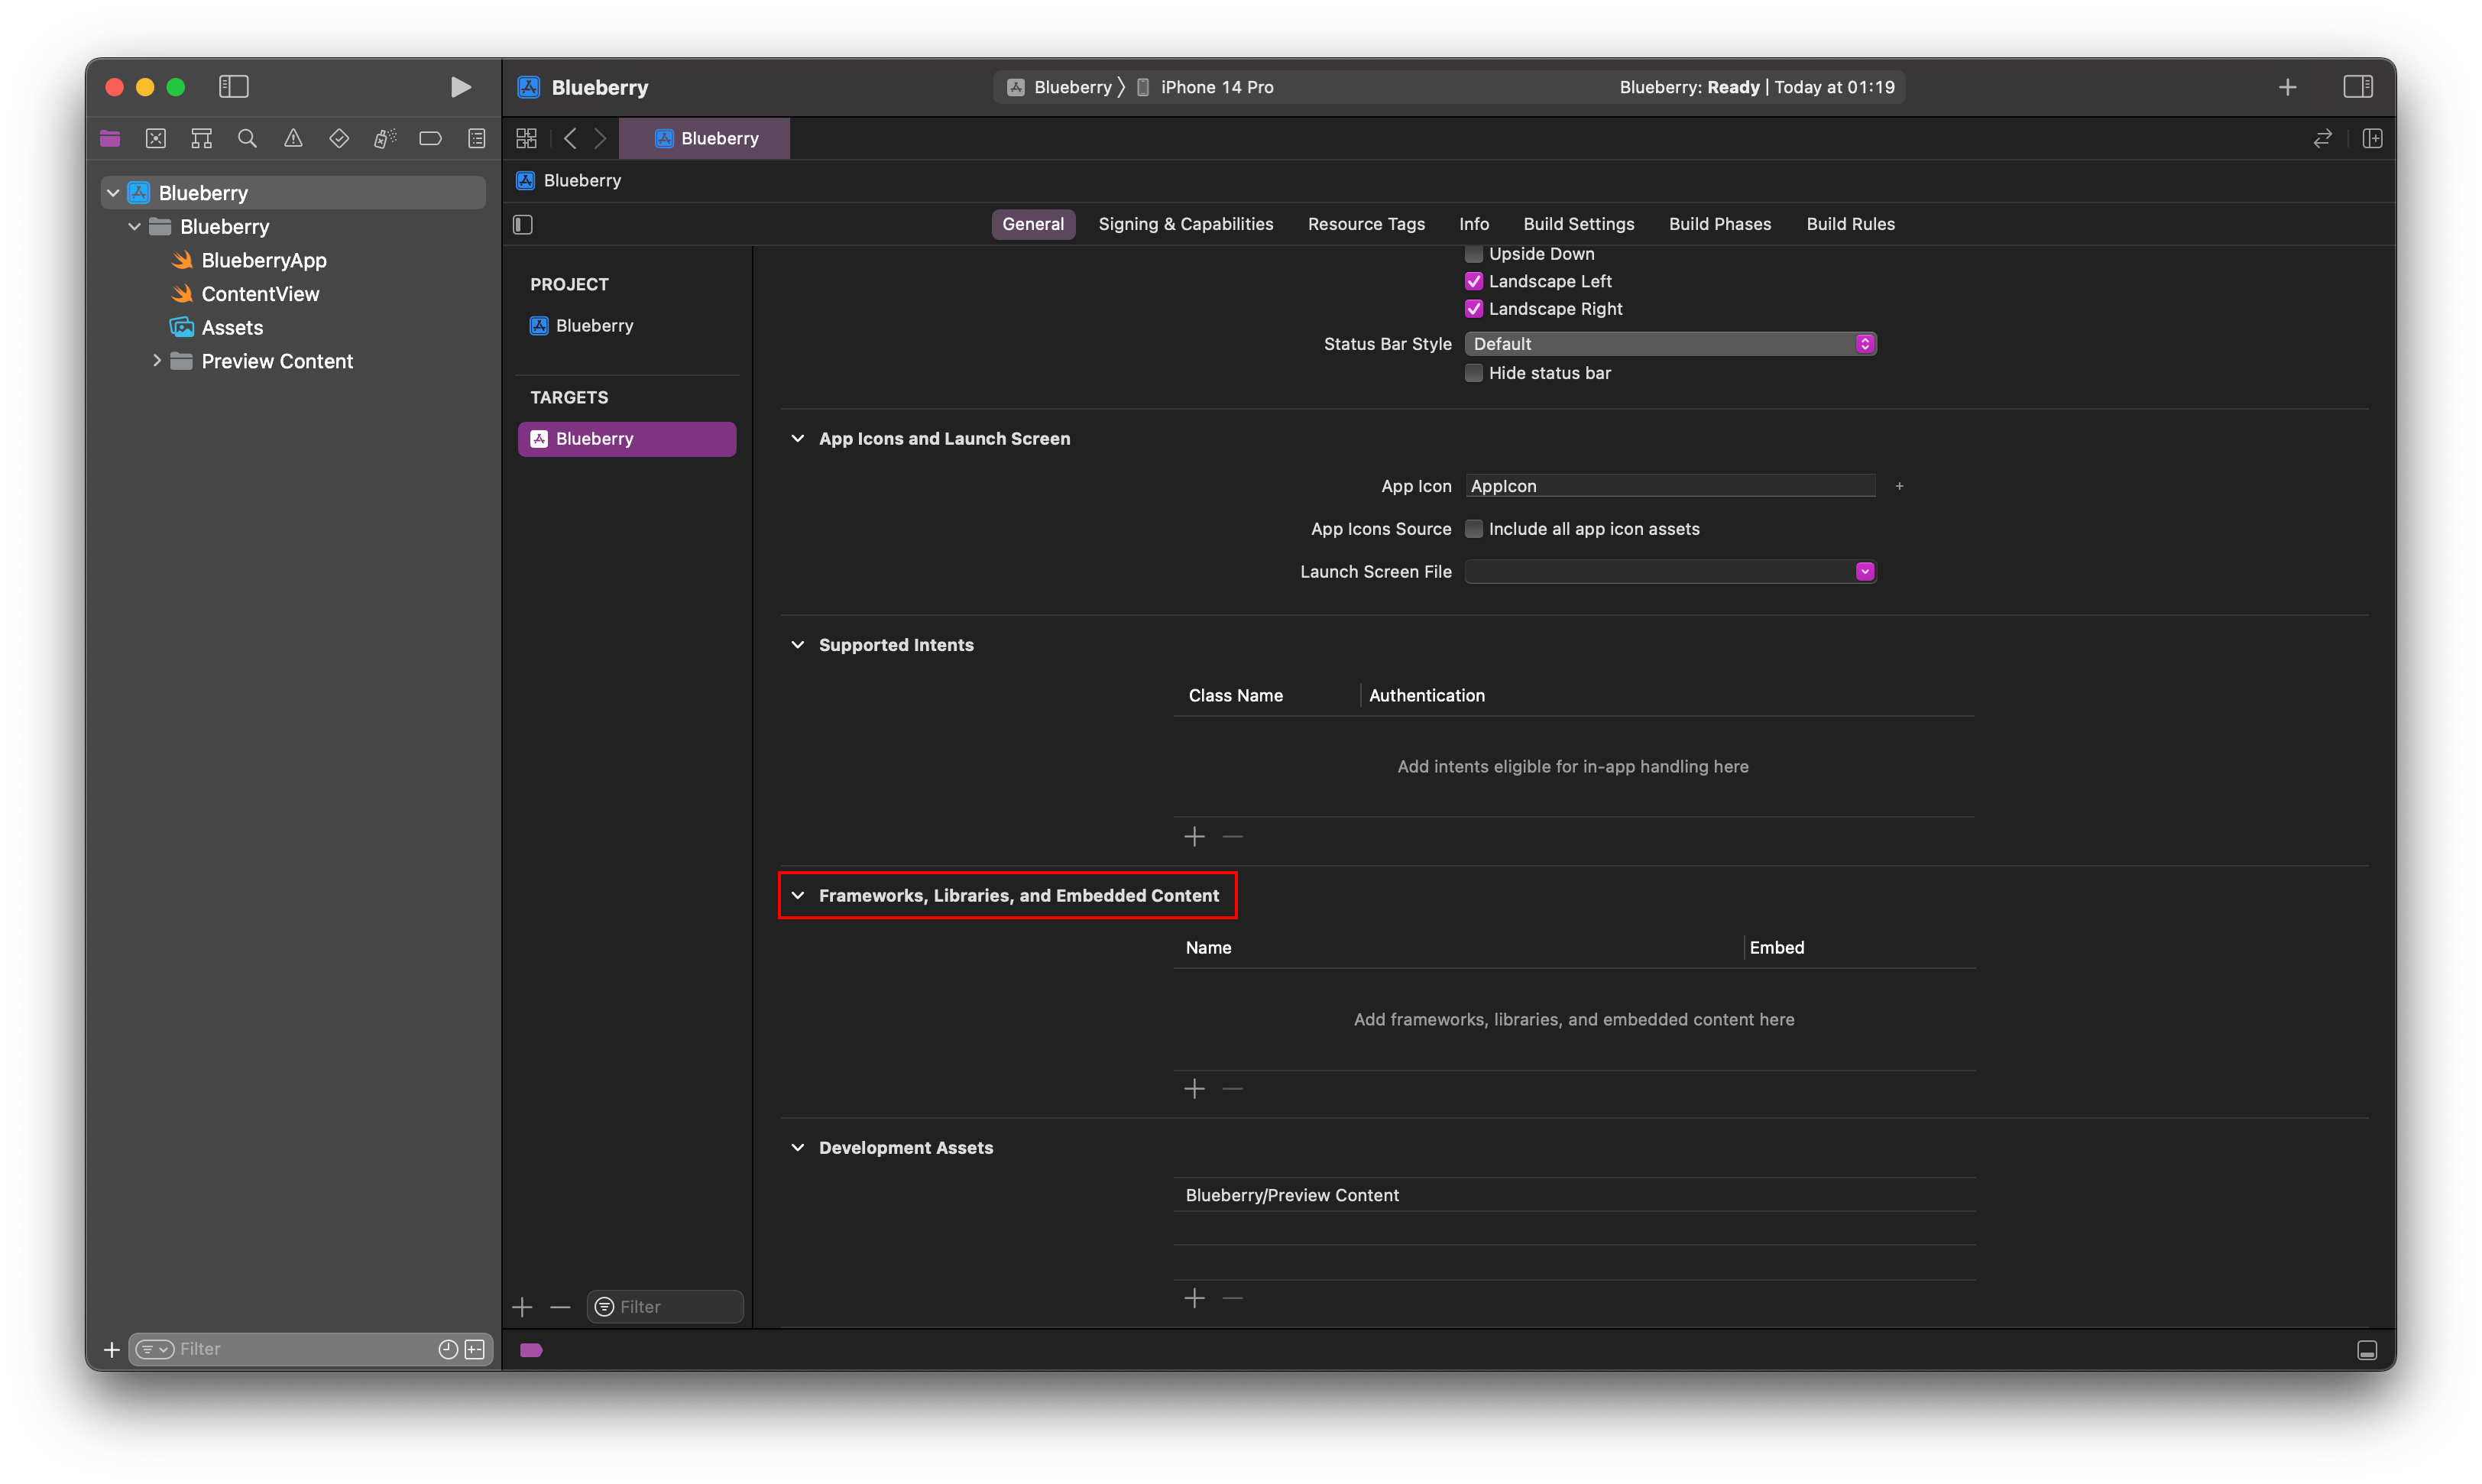
Then scroll down to "Frameworks, Libraries, and Embedded Content".
Then click the + symbol. Then in the new window click on "Add Other..." and then "Add Files...".
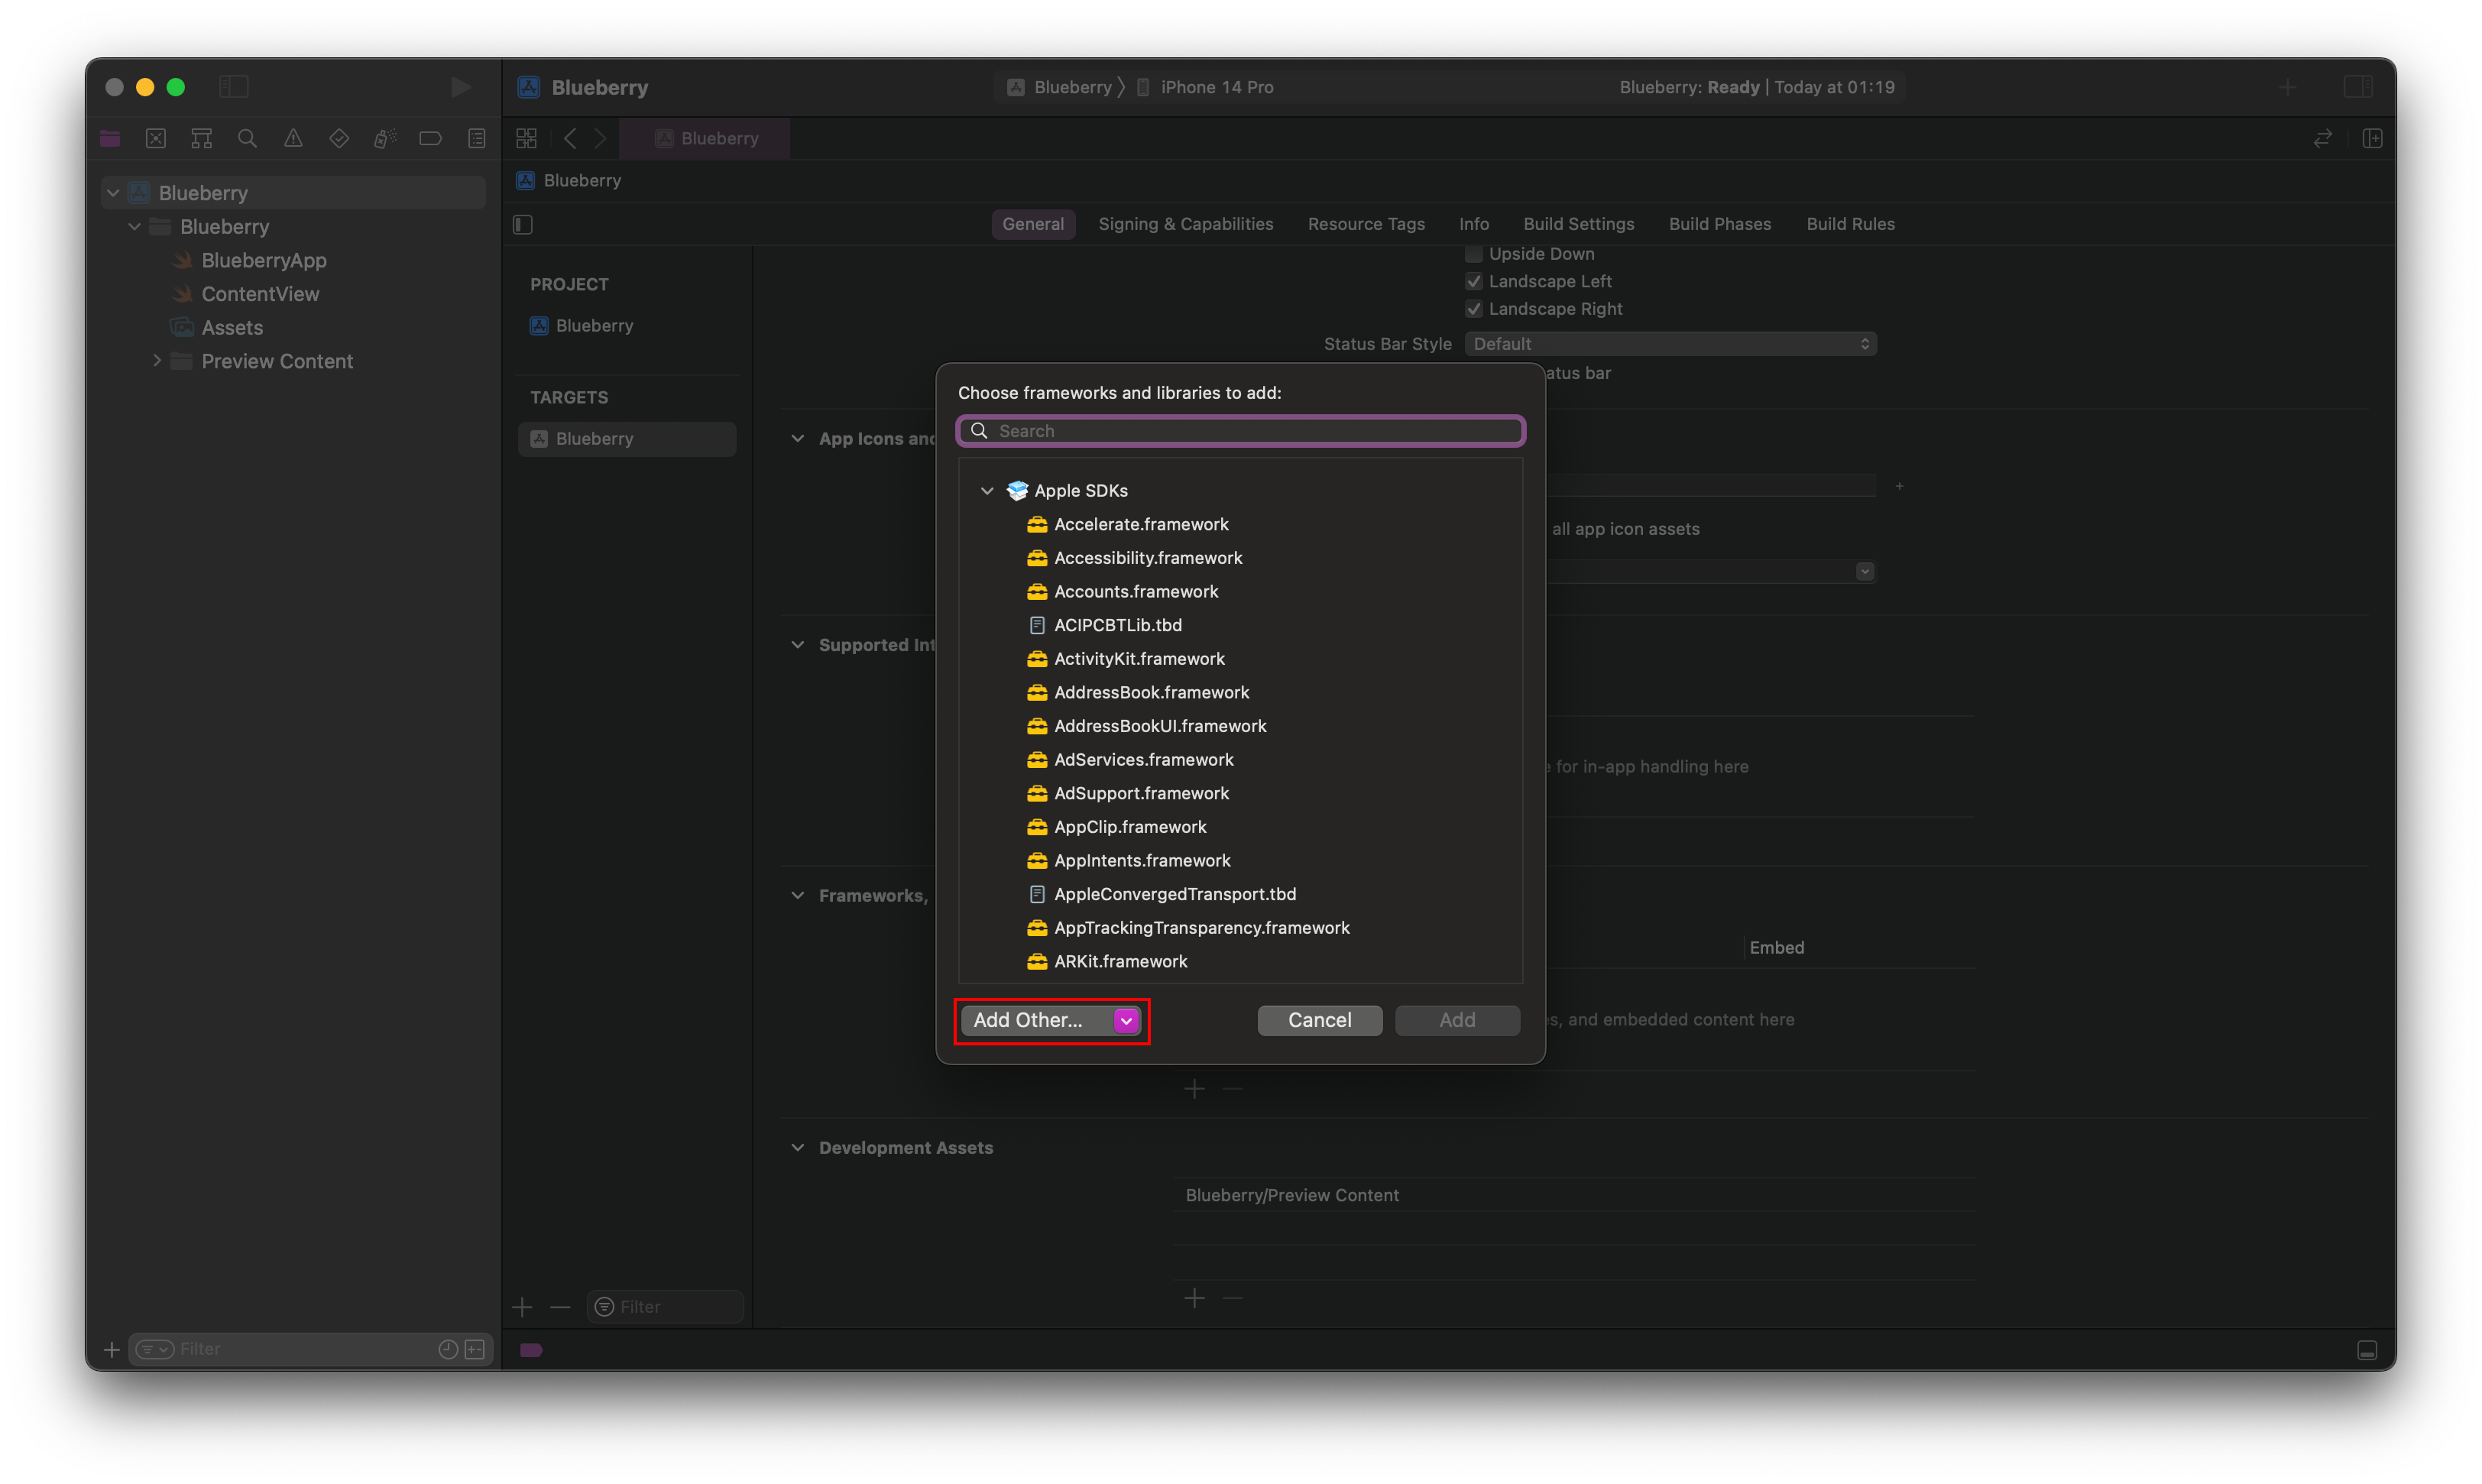
Then select the XCFrameworks folder you made in the rust library.
Then click on the Embed tab and make sure it's set to "Do Not Embed".
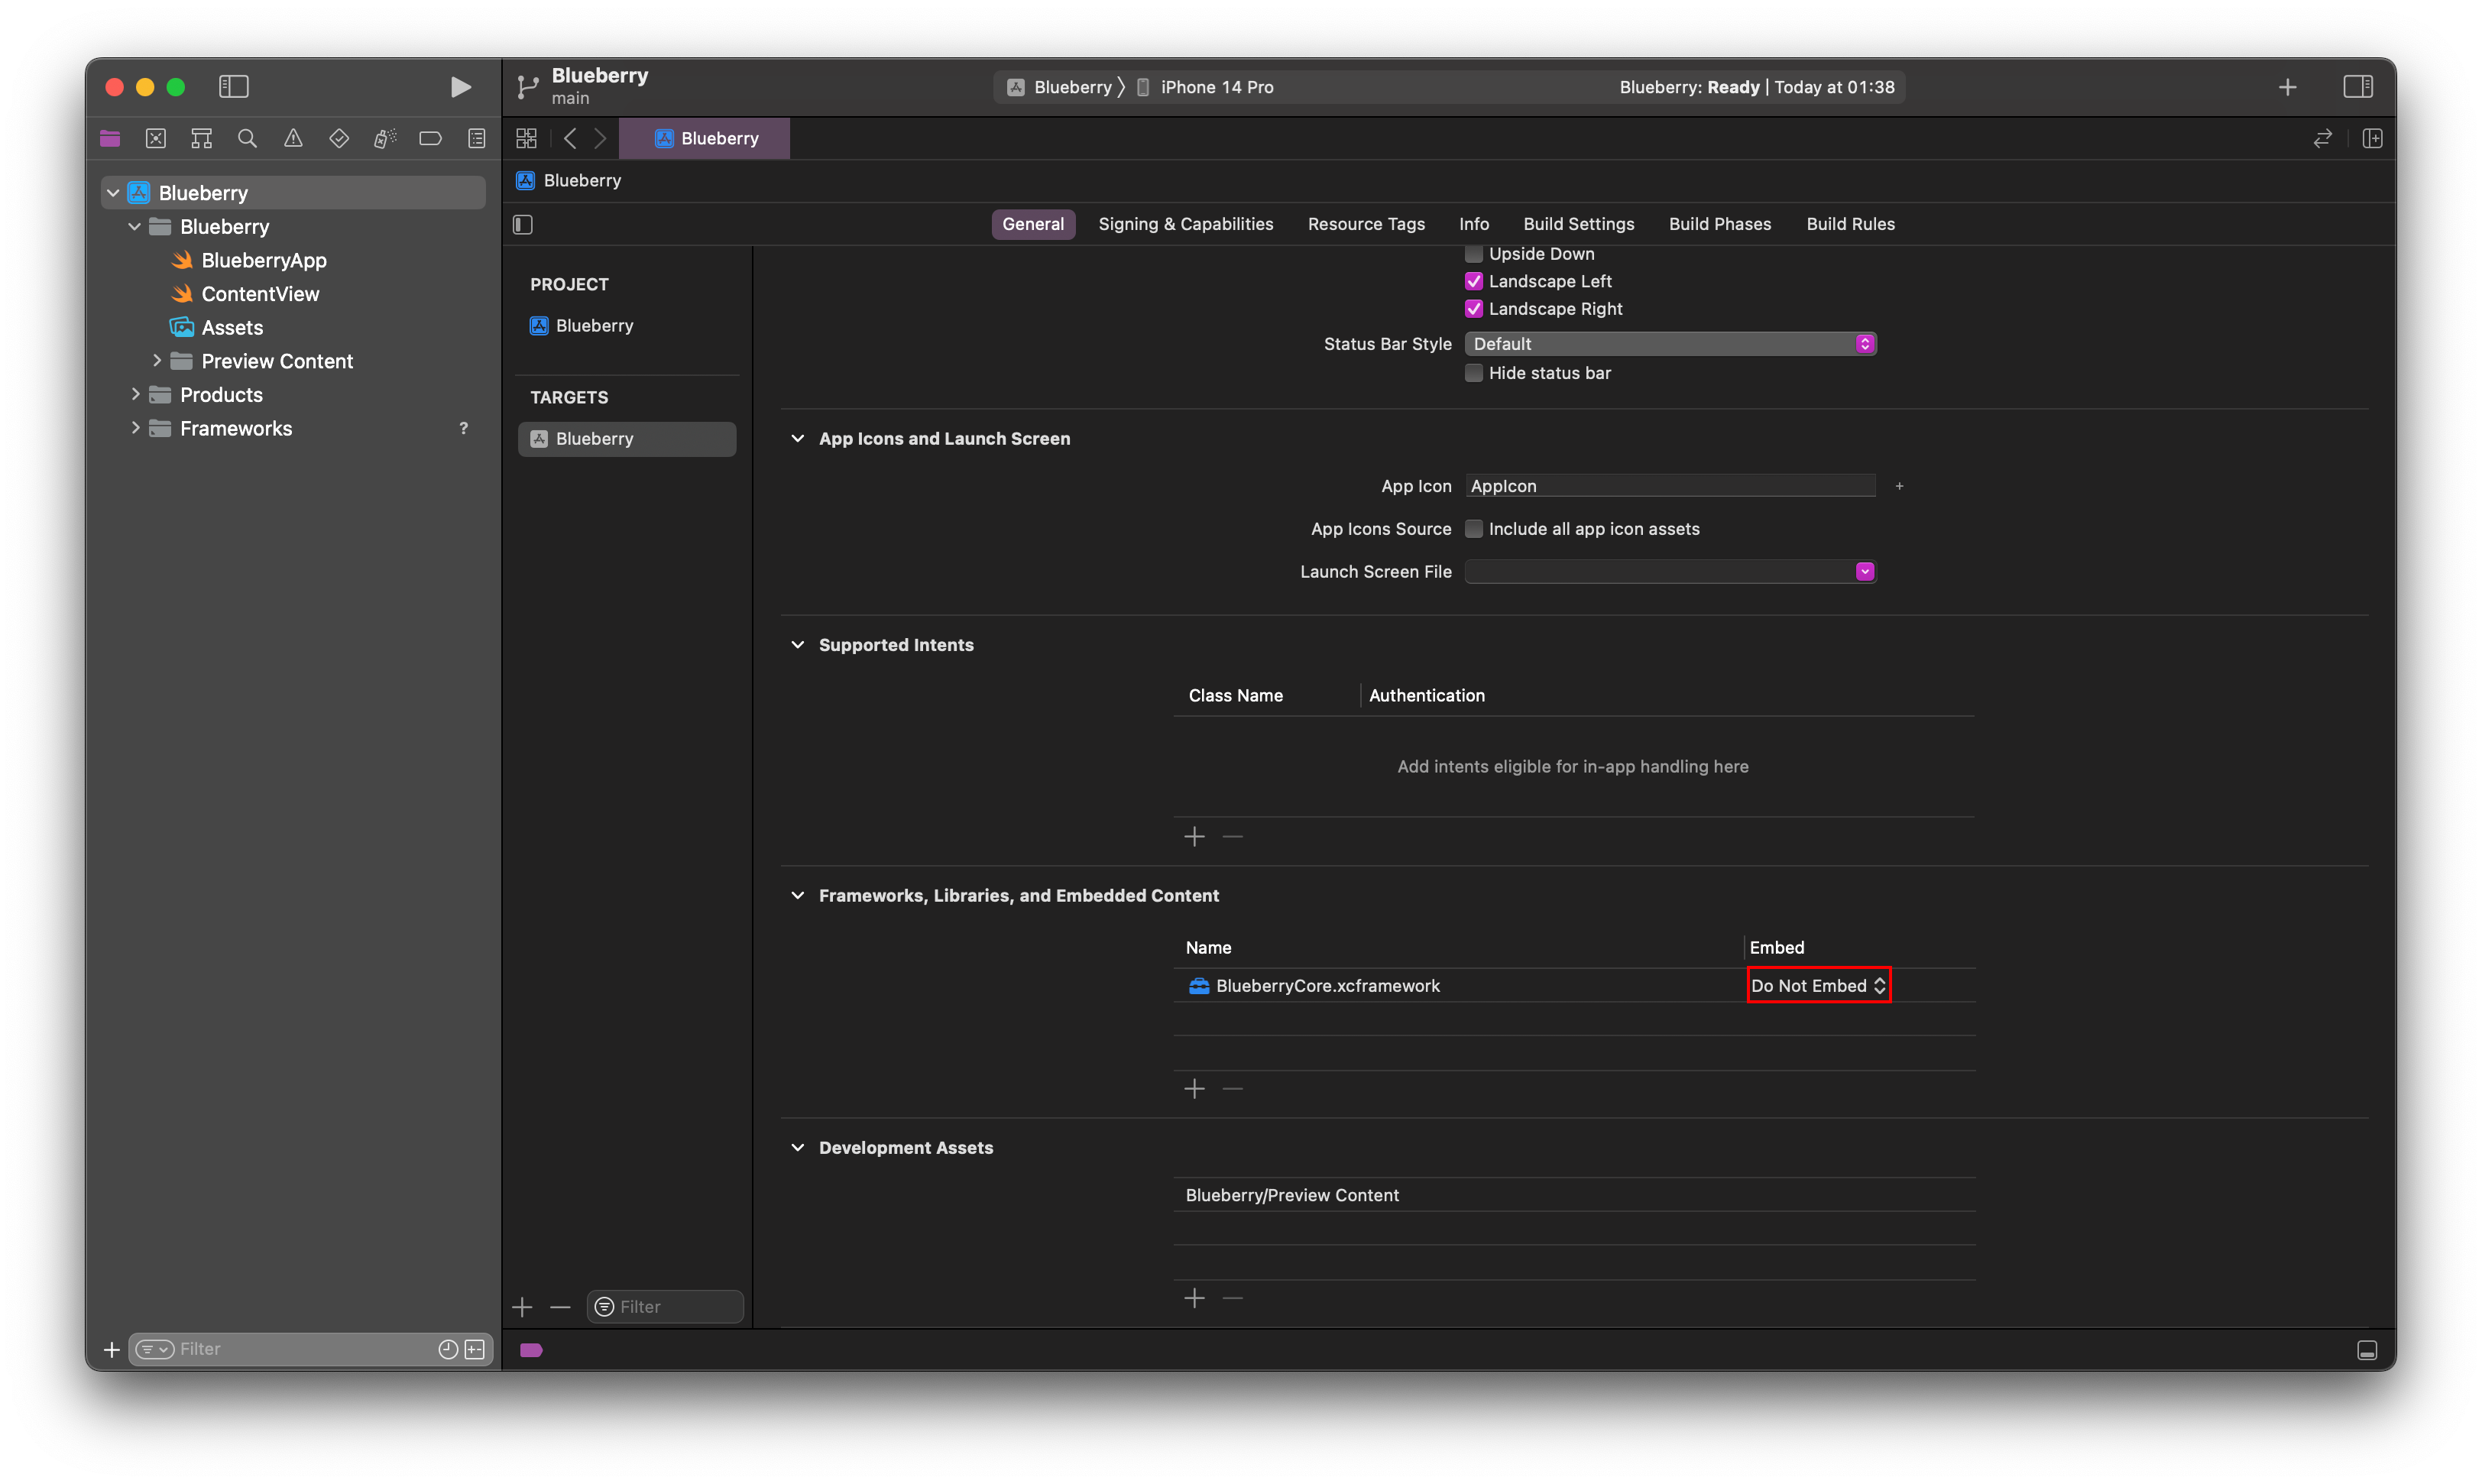
If it's not set to "Do Not Embed" the project will work in the simulator, but won't successfully build on an actual iPhone. I don't exactly know why this is, but I do suspect it has something to do with some security concerns?
Then make a new folder called "Lib" by right clicking the project index in the navigation tree and selecting "New Group" and calling it "Lib".
Then go to the "Build Phases" tab and click the + icon, then select "New Run Script Phase".
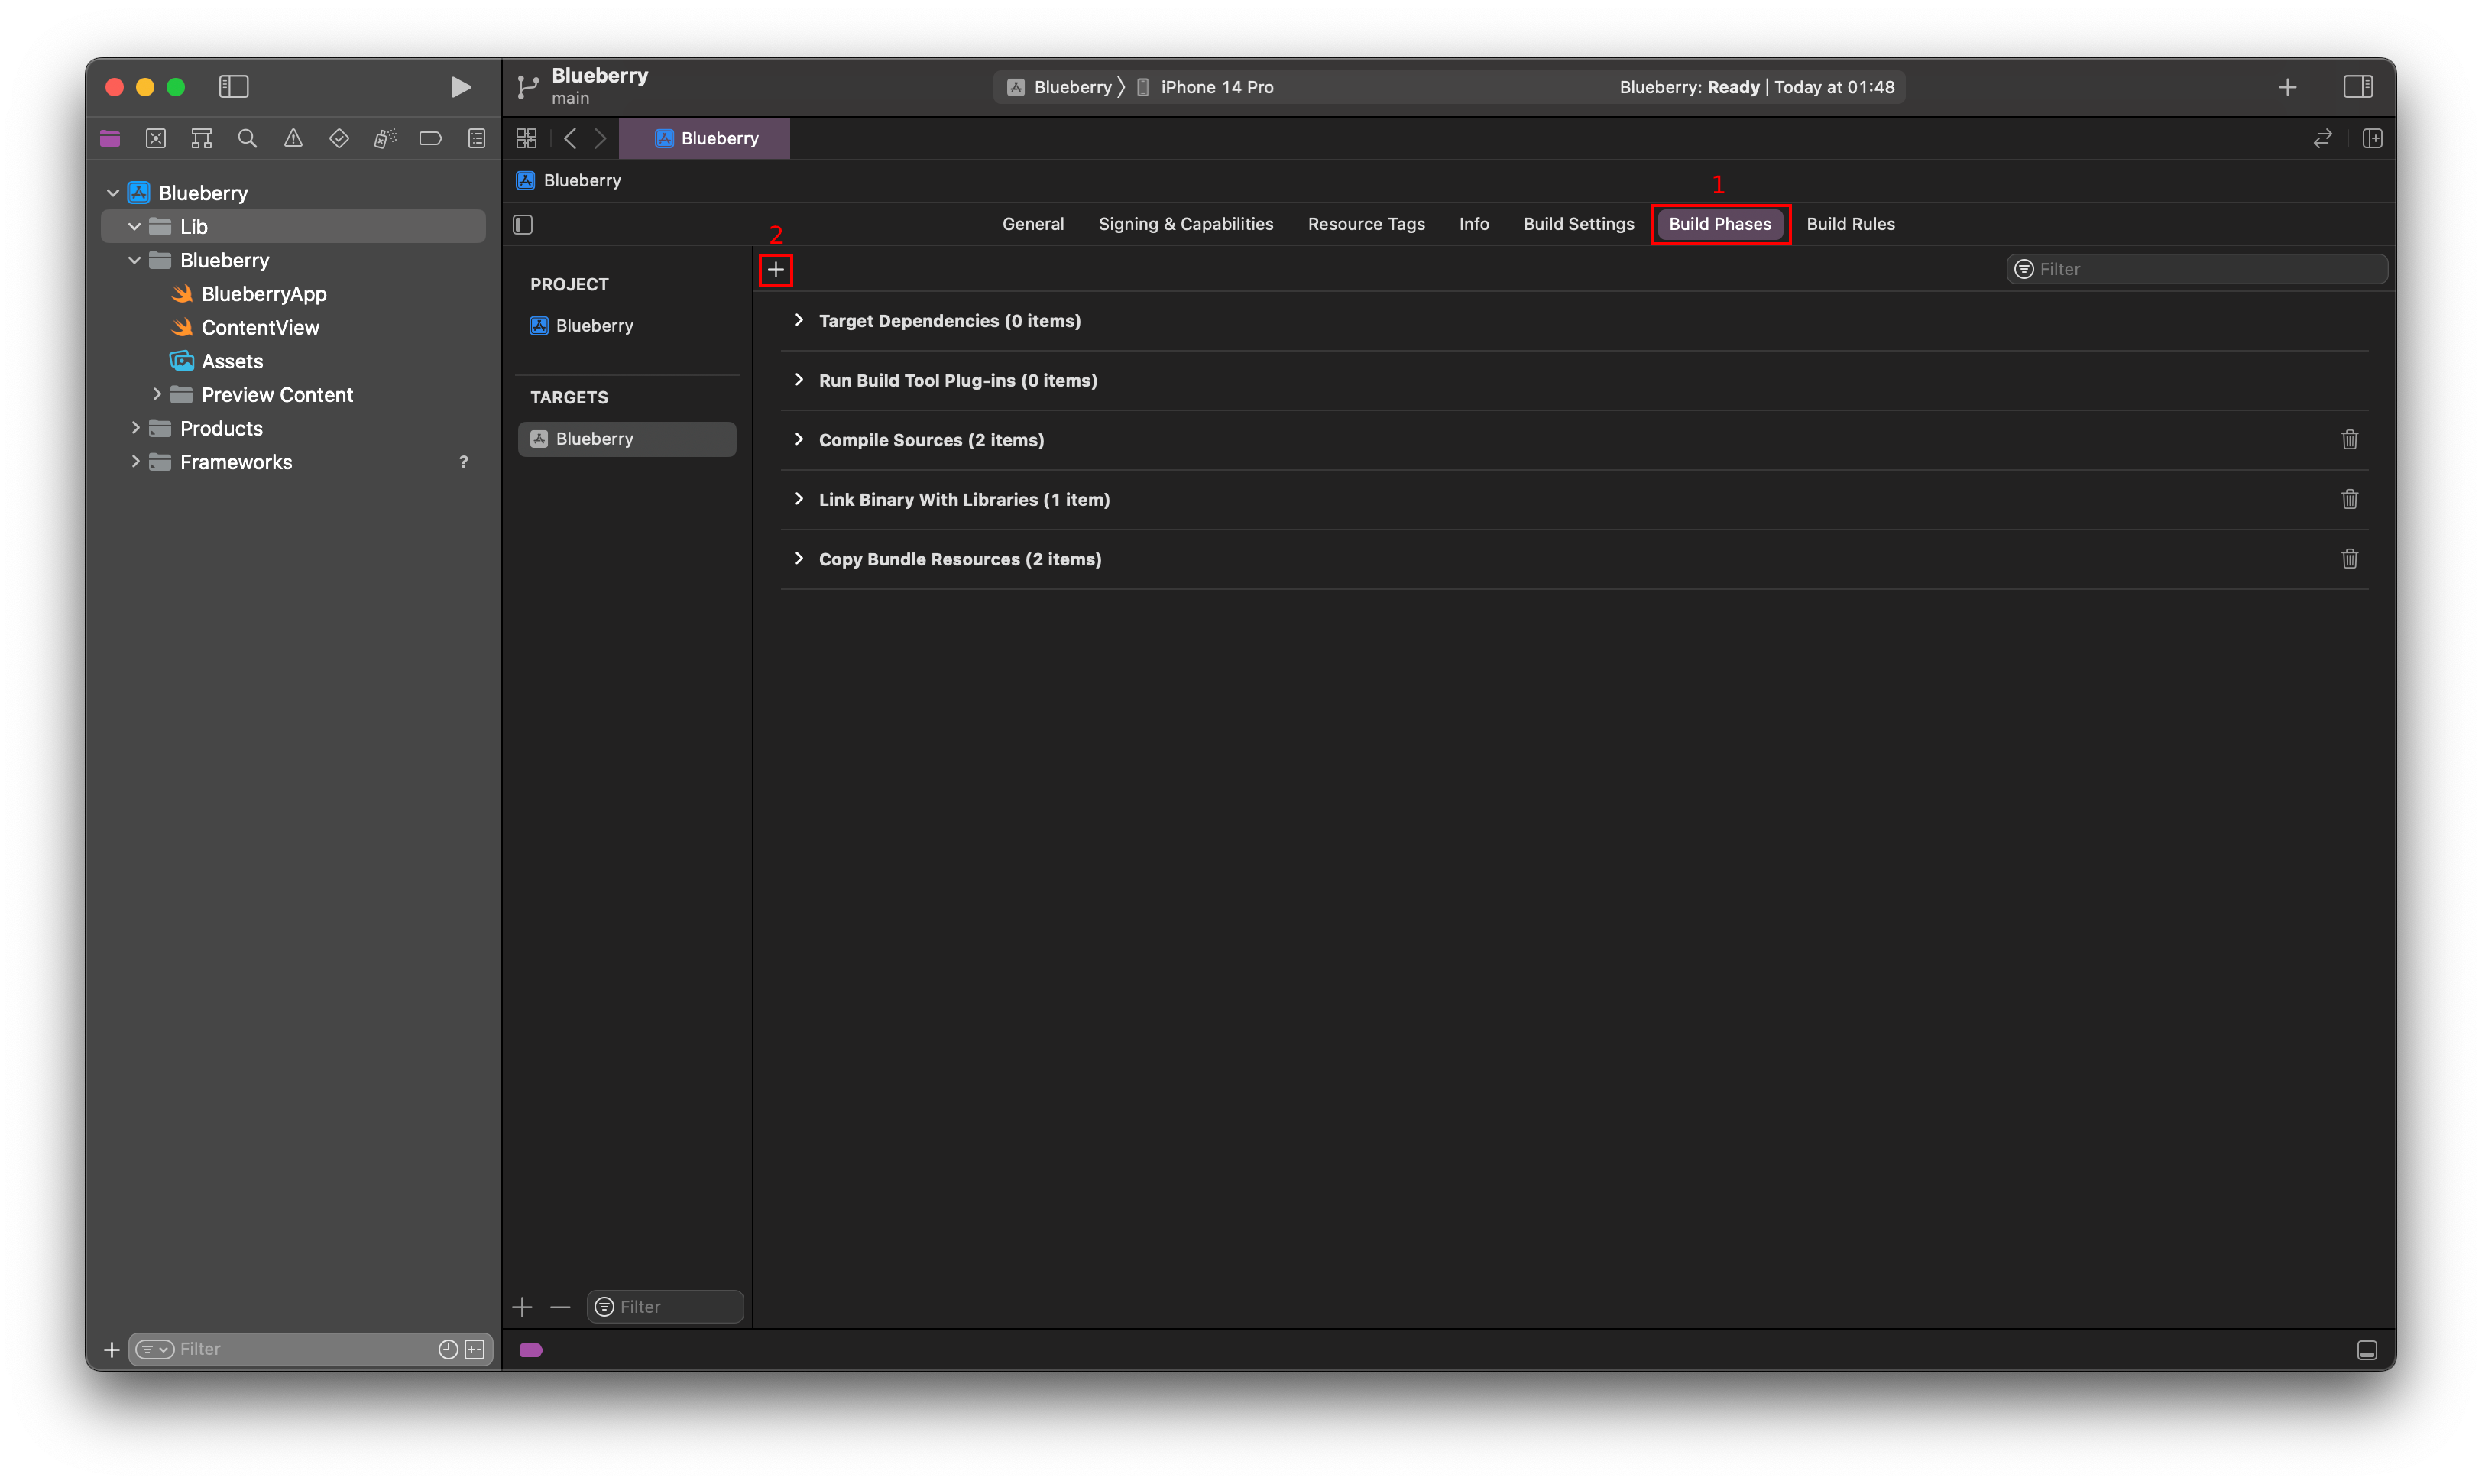
Then drag the new "Run Script" line as far up as it goes. (This is usually 3rd).
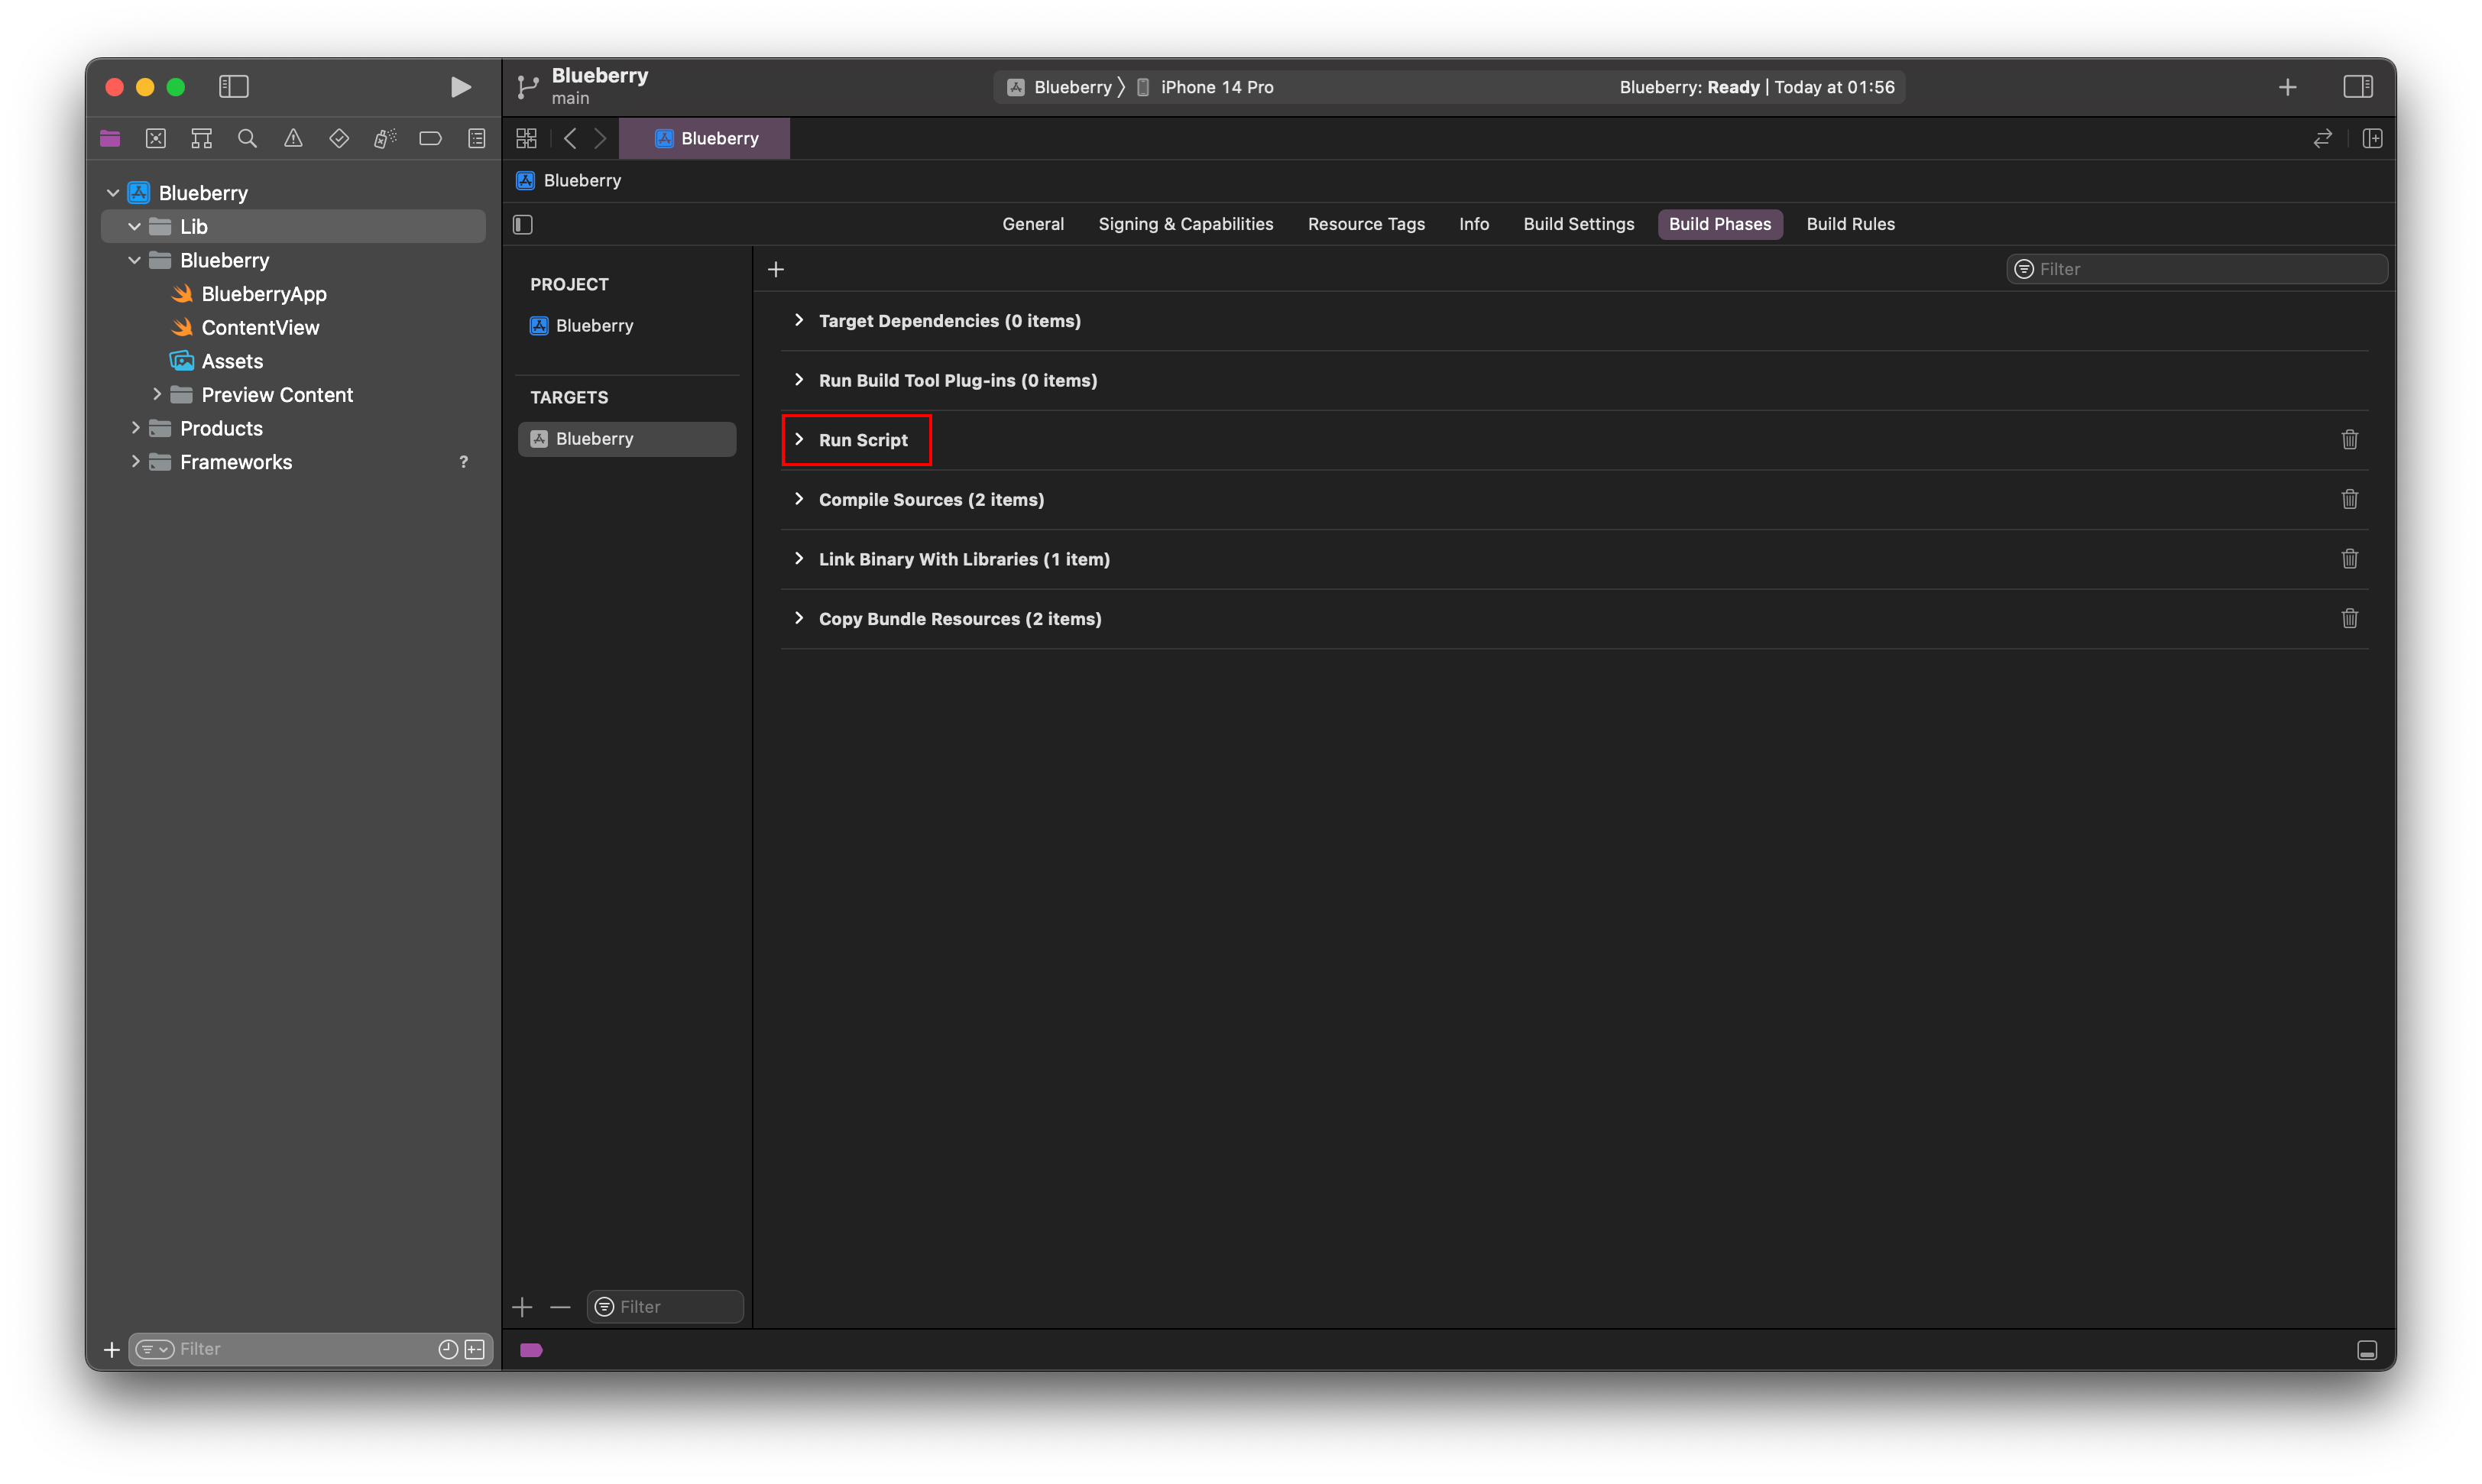
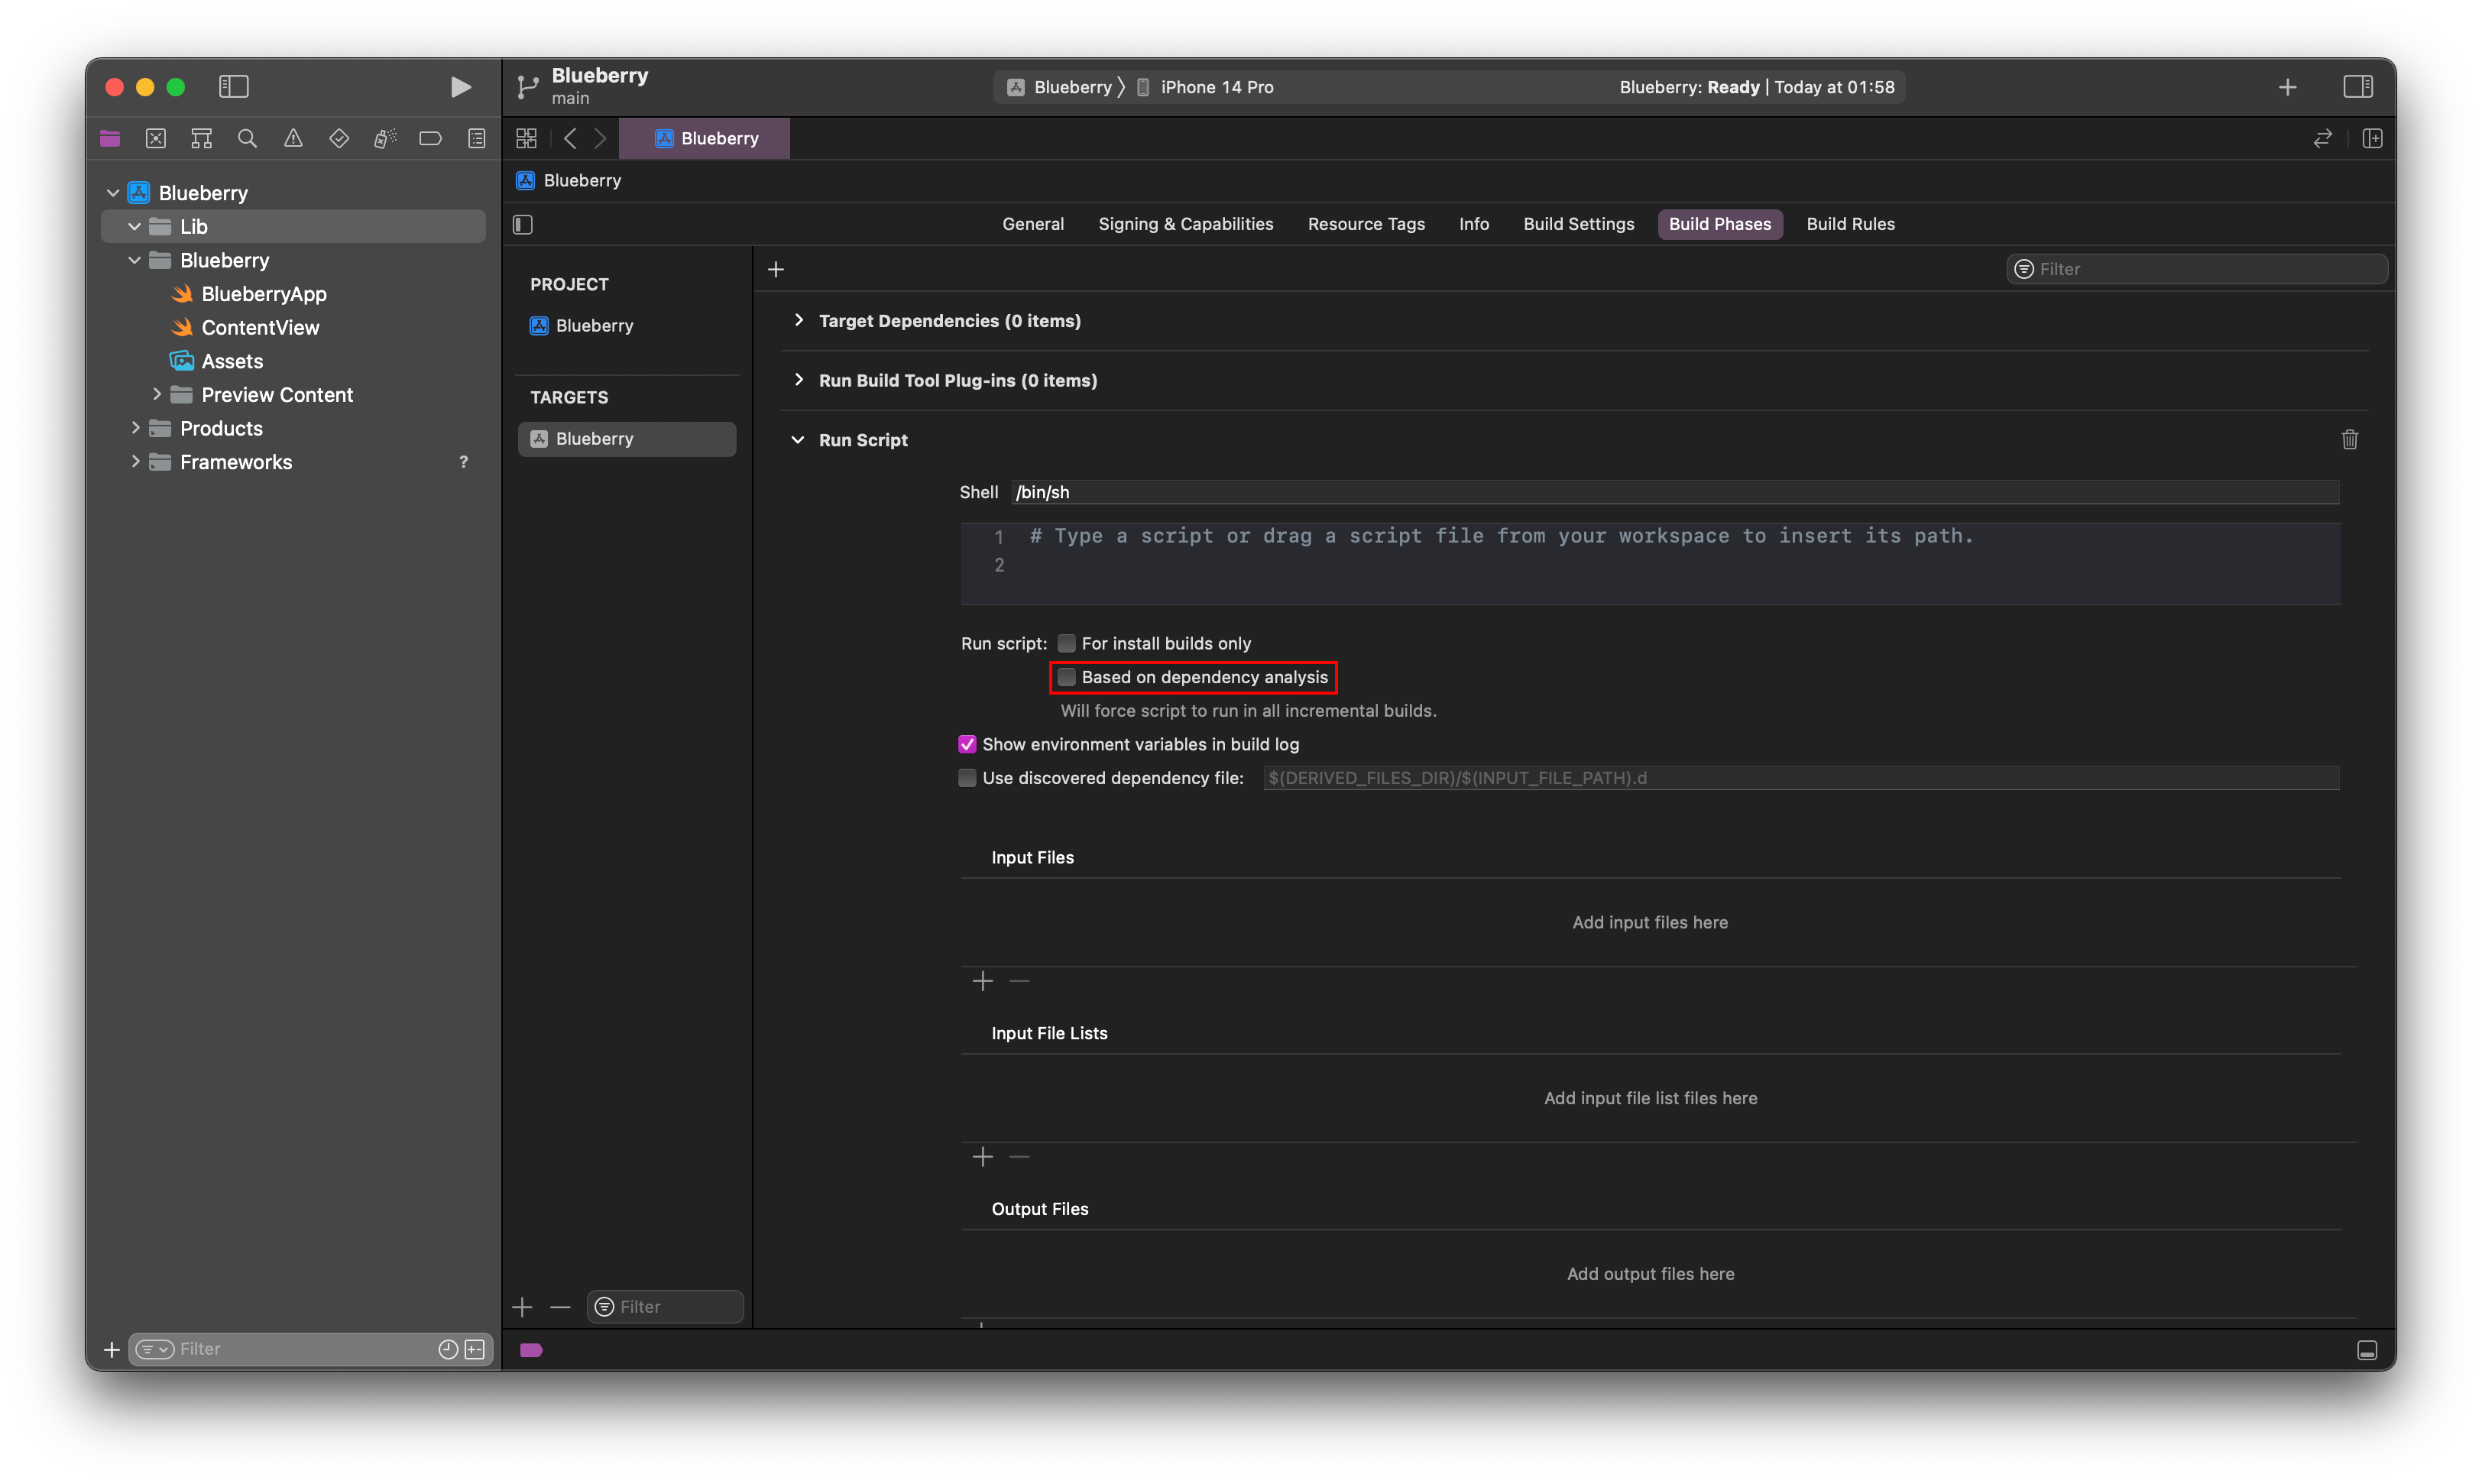
Then open the "Run Script" index and deselect the "Based on dependency analysis" option. What this option is supposed to do is watch the source files of the rust library and only compile new binaries if there has been any new changes, but I don't know how to do this yet so I simply let it compile new library binaries at every iOS build. Because if there hasn't been any changes to the source code, the rust compiler won't compile the binaries again anyway, so this leaves the "Based on dependency analysis" option redundant.
Now we add the actual script. Paste these lines in the script field.
Bash
set -e # Helps to give error info

# Project paths
RUST_PROJ="/Users/kf/code/ios/example-lib"
IOS_LIB="/Users/kf/code/ios/Blueberry/Lib"

LOCAL_UDL="src/blueberry.udl"
UDL_NAME="blueberry"
FRAMEWORK_NAME="BlueberryCore"
SWIFT_INTERFACE="BlueberryLib"

# Binary paths
PATH="$PATH:/Users/kf/.cargo/bin" # Adds the rust compiler
PATH="$PATH:/opt/homebrew/bin" # Adds swiftformat to the path

cd "$RUST_PROJ"

# Compile the rust
cargo build --target aarch64-apple-ios
cargo build --target aarch64-apple-ios-sim
cargo build --target x86_64-apple-ios

# Remove old files if they exist
IOS_ARM64_FRAMEWORK="$FRAMEWORK_NAME.xcframework/ios-arm64/$FRAMEWORK_NAME.framework"
IOS_SIM_FRAMEWORK="$FRAMEWORK_NAME.xcframework/ios-arm64_x86_64-simulator/$FRAMEWORK_NAME.framework"

rm -f "$IOS_ARM64_FRAMEWORK/$FRAMEWORK_NAME"
rm -f "$IOS_ARM64_FRAMEWORK/Headers/${UDL_NAME}FFI.h"
rm -f "$IOS_SIM_FRAMEWORK/$FRAMEWORK_NAME"
rm -f "$IOS_SIM_FRAMEWORK/Headers/${UDL_NAME}FFI.h"

rm -f target/universal.a
rm -f include/ios/*

# Make dirs if it doesn't exist
mkdir -p include/ios

# UniFfi bindgen
cargo run --bin uniffi-bindgen generate "$LOCAL_UDL" --language swift --out-dir ./include/ios

# Make fat lib for sims
lipo -create \
    "target/aarch64-apple-ios-sim/debug/lib${UDL_NAME}.a" \
    "target/x86_64-apple-ios/debug/lib${UDL_NAME}.a" \
    -output target/universal.a

# Move binaries
cp "target/aarch64-apple-ios/debug/lib${UDL_NAME}.a" \
    "$IOS_ARM64_FRAMEWORK/$FRAMEWORK_NAME"
cp target/universal.a \
    "$IOS_SIM_FRAMEWORK/$FRAMEWORK_NAME"

# Move headers
cp "include/ios/${UDL_NAME}FFI.h" \
    "$IOS_ARM64_FRAMEWORK/Headers/${UDL_NAME}FFI.h"
cp "include/ios/${UDL_NAME}FFI.h" \
    "$IOS_SIM_FRAMEWORK/Headers/${UDL_NAME}FFI.h"

# Move swift interface
sed "s/${UDL_NAME}FFI/$FRAMEWORK_NAME/g" "include/ios/$UDL_NAME.swift" > "include/ios/$SWIFT_INTERFACE.swift"
rm -f "$IOS_LIB/$SWIFT_INTERFACE.swift"
cp "include/ios/$SWIFT_INTERFACE.swift" "$IOS_LIB/"
This is the script I have in my example project with the relevant names for me. You should change:
- RUST_PROJ to the full path to your rust library
- IOS_LIB to the full path to the Lib folder in your Xcode project
- LOCAL_UDL to the relative path to your
.udlfile from the root of your rust library - UDL_NAME to the name of you library from the
[lib]name section of your "Cargo.toml" file - FRAMEWORK_NAME to the name of your XCFrameworks
- SWIFT_INTERFACE to a fitting name for the interface. I chose BlueberryCore for the framework itself, and BlueberryLib for the interface I actually use
- The first PATH should point to your ".cargo/bin"
- The second PATH should point to your homebrew bin folder, which is usually "/opt/homebrew/bin" on Apple Silicon Macs
The reason homebrew is needed for the build phase is because we need the swiftformat program to compile the library. So remember to install swiftformat if you don't have it already.
Shell
λ brew install swiftformatThen you should do a test build of your project by running "⌘ + b". If there are any errors it will be easier to weed them out now.
Then we have to bind the "BlueberryLib.swift" interface file to Xcode by going to the "Lib" folder in Finder, and dragging the "BlueberryLib.swift" into the "Lib" folder in Xcode.
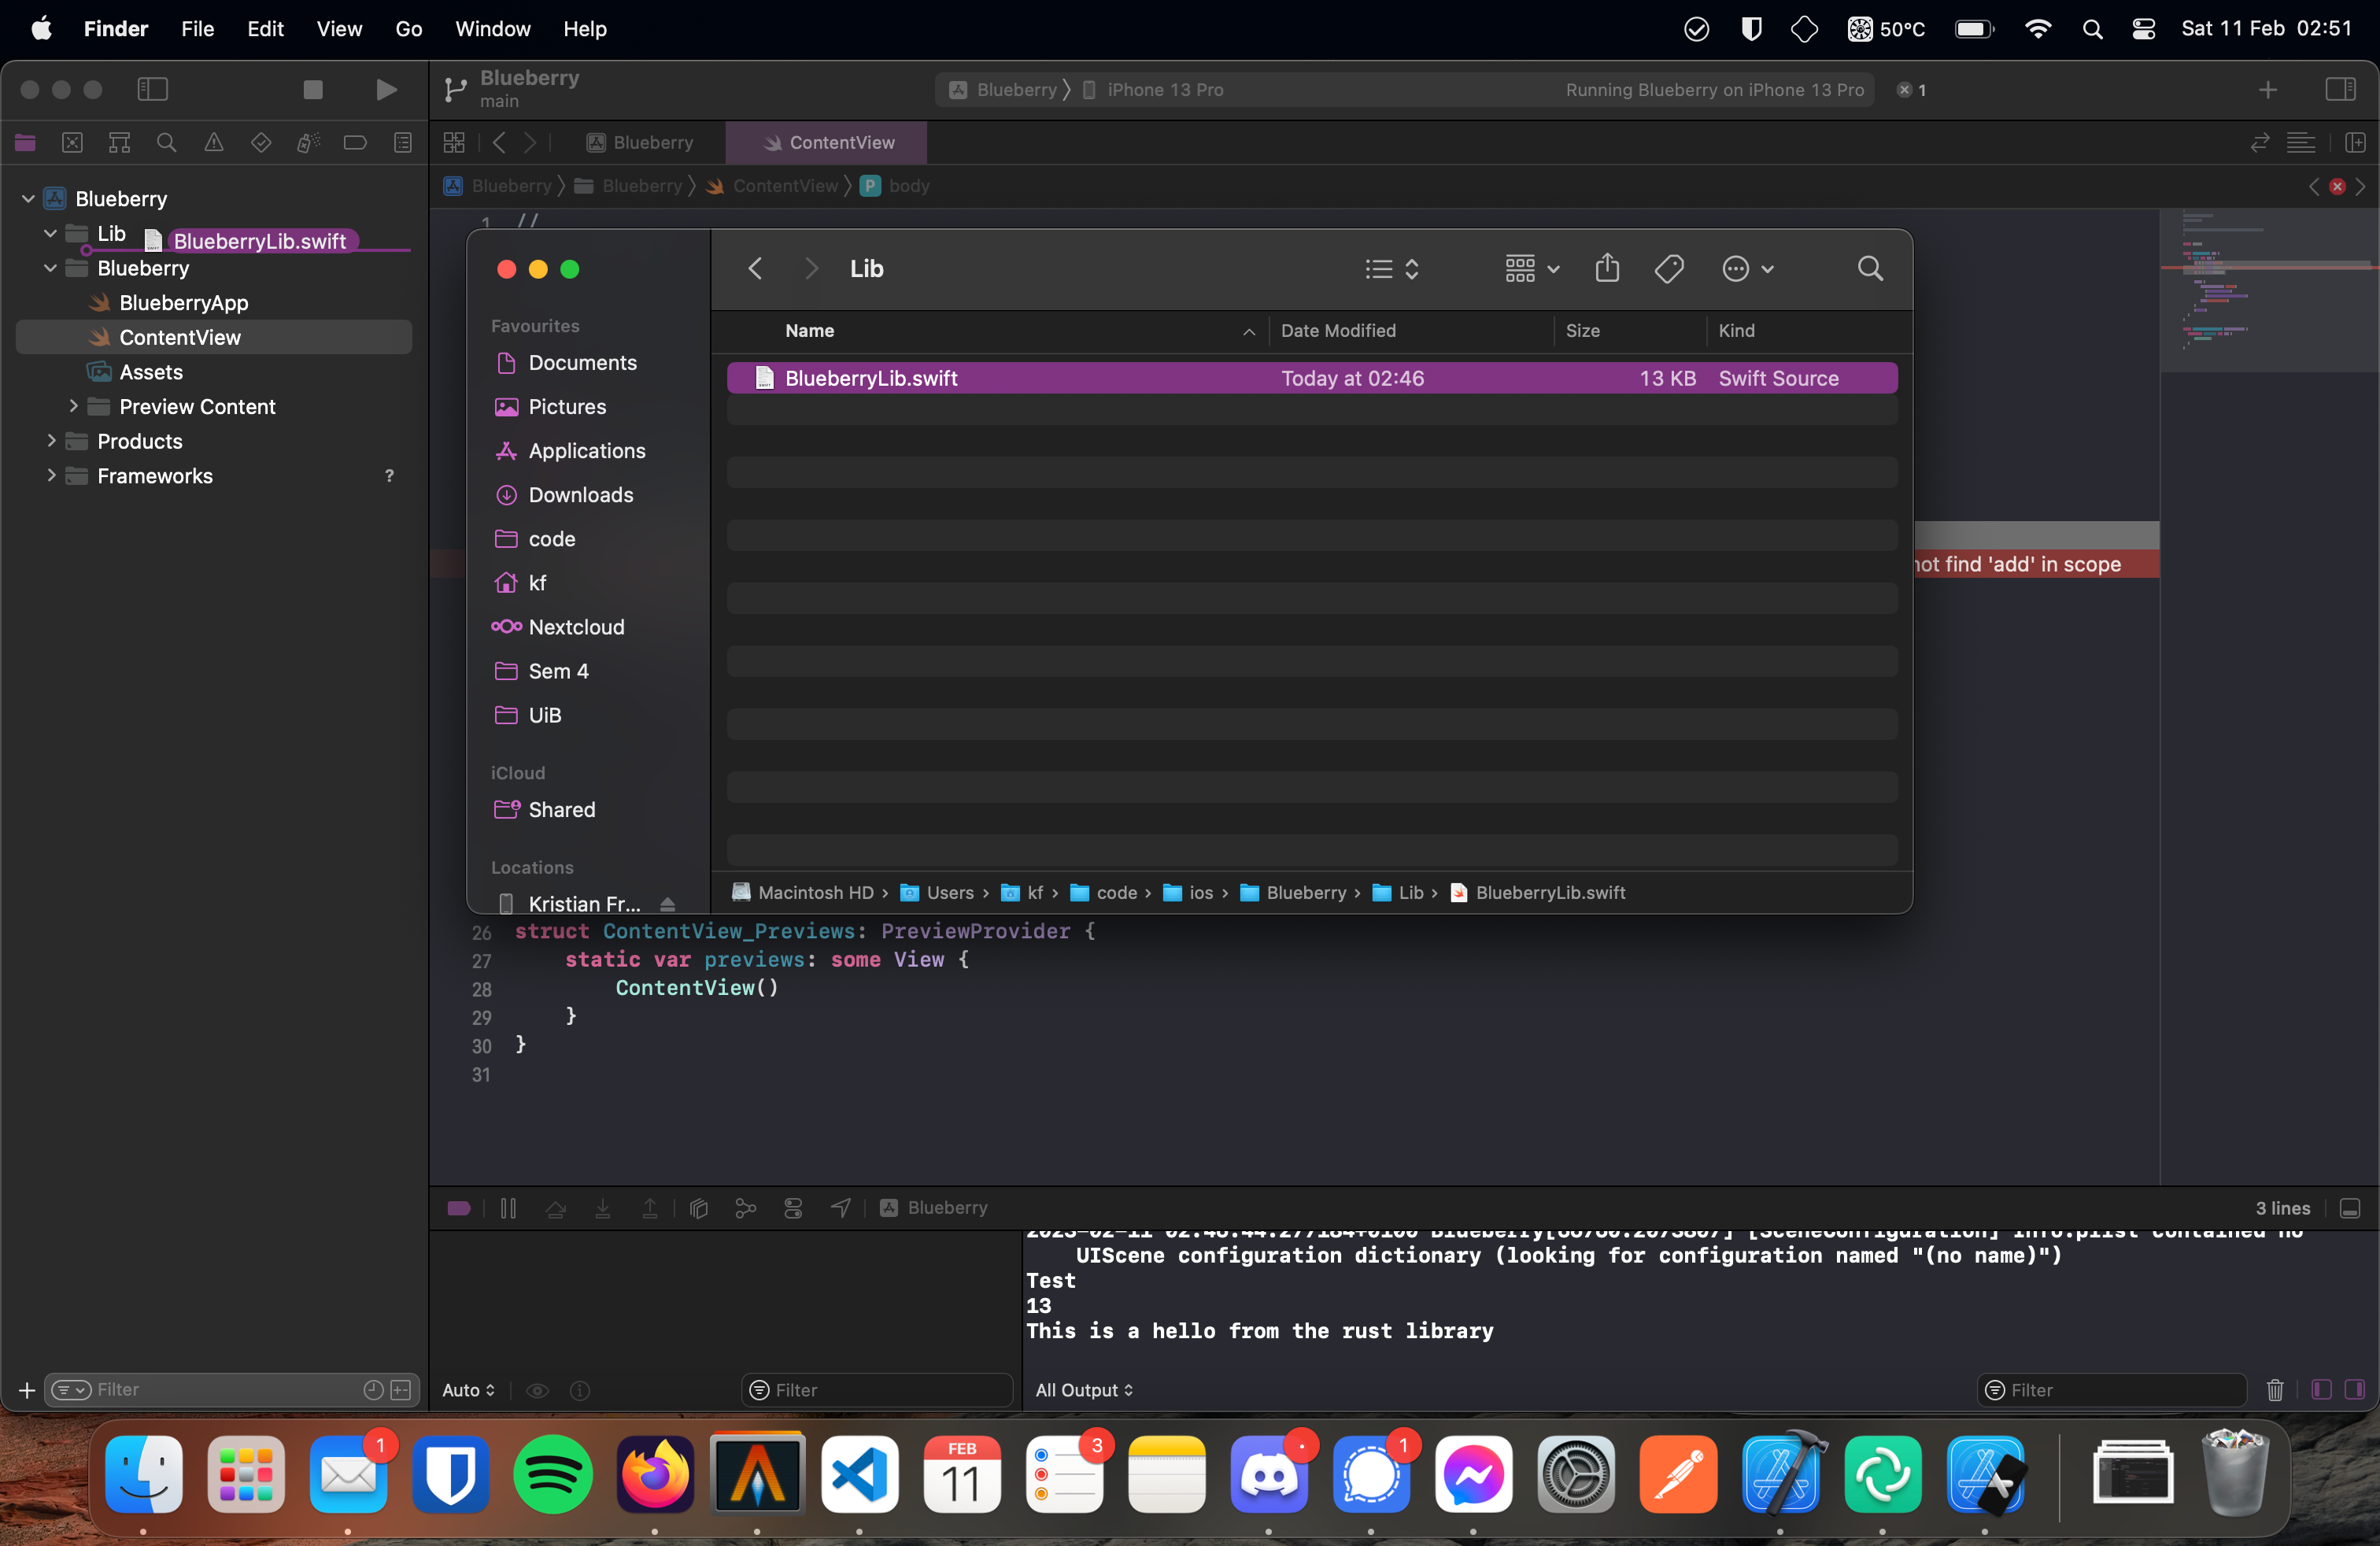
You should then have these options selected to make sure the file gets updated when we build.
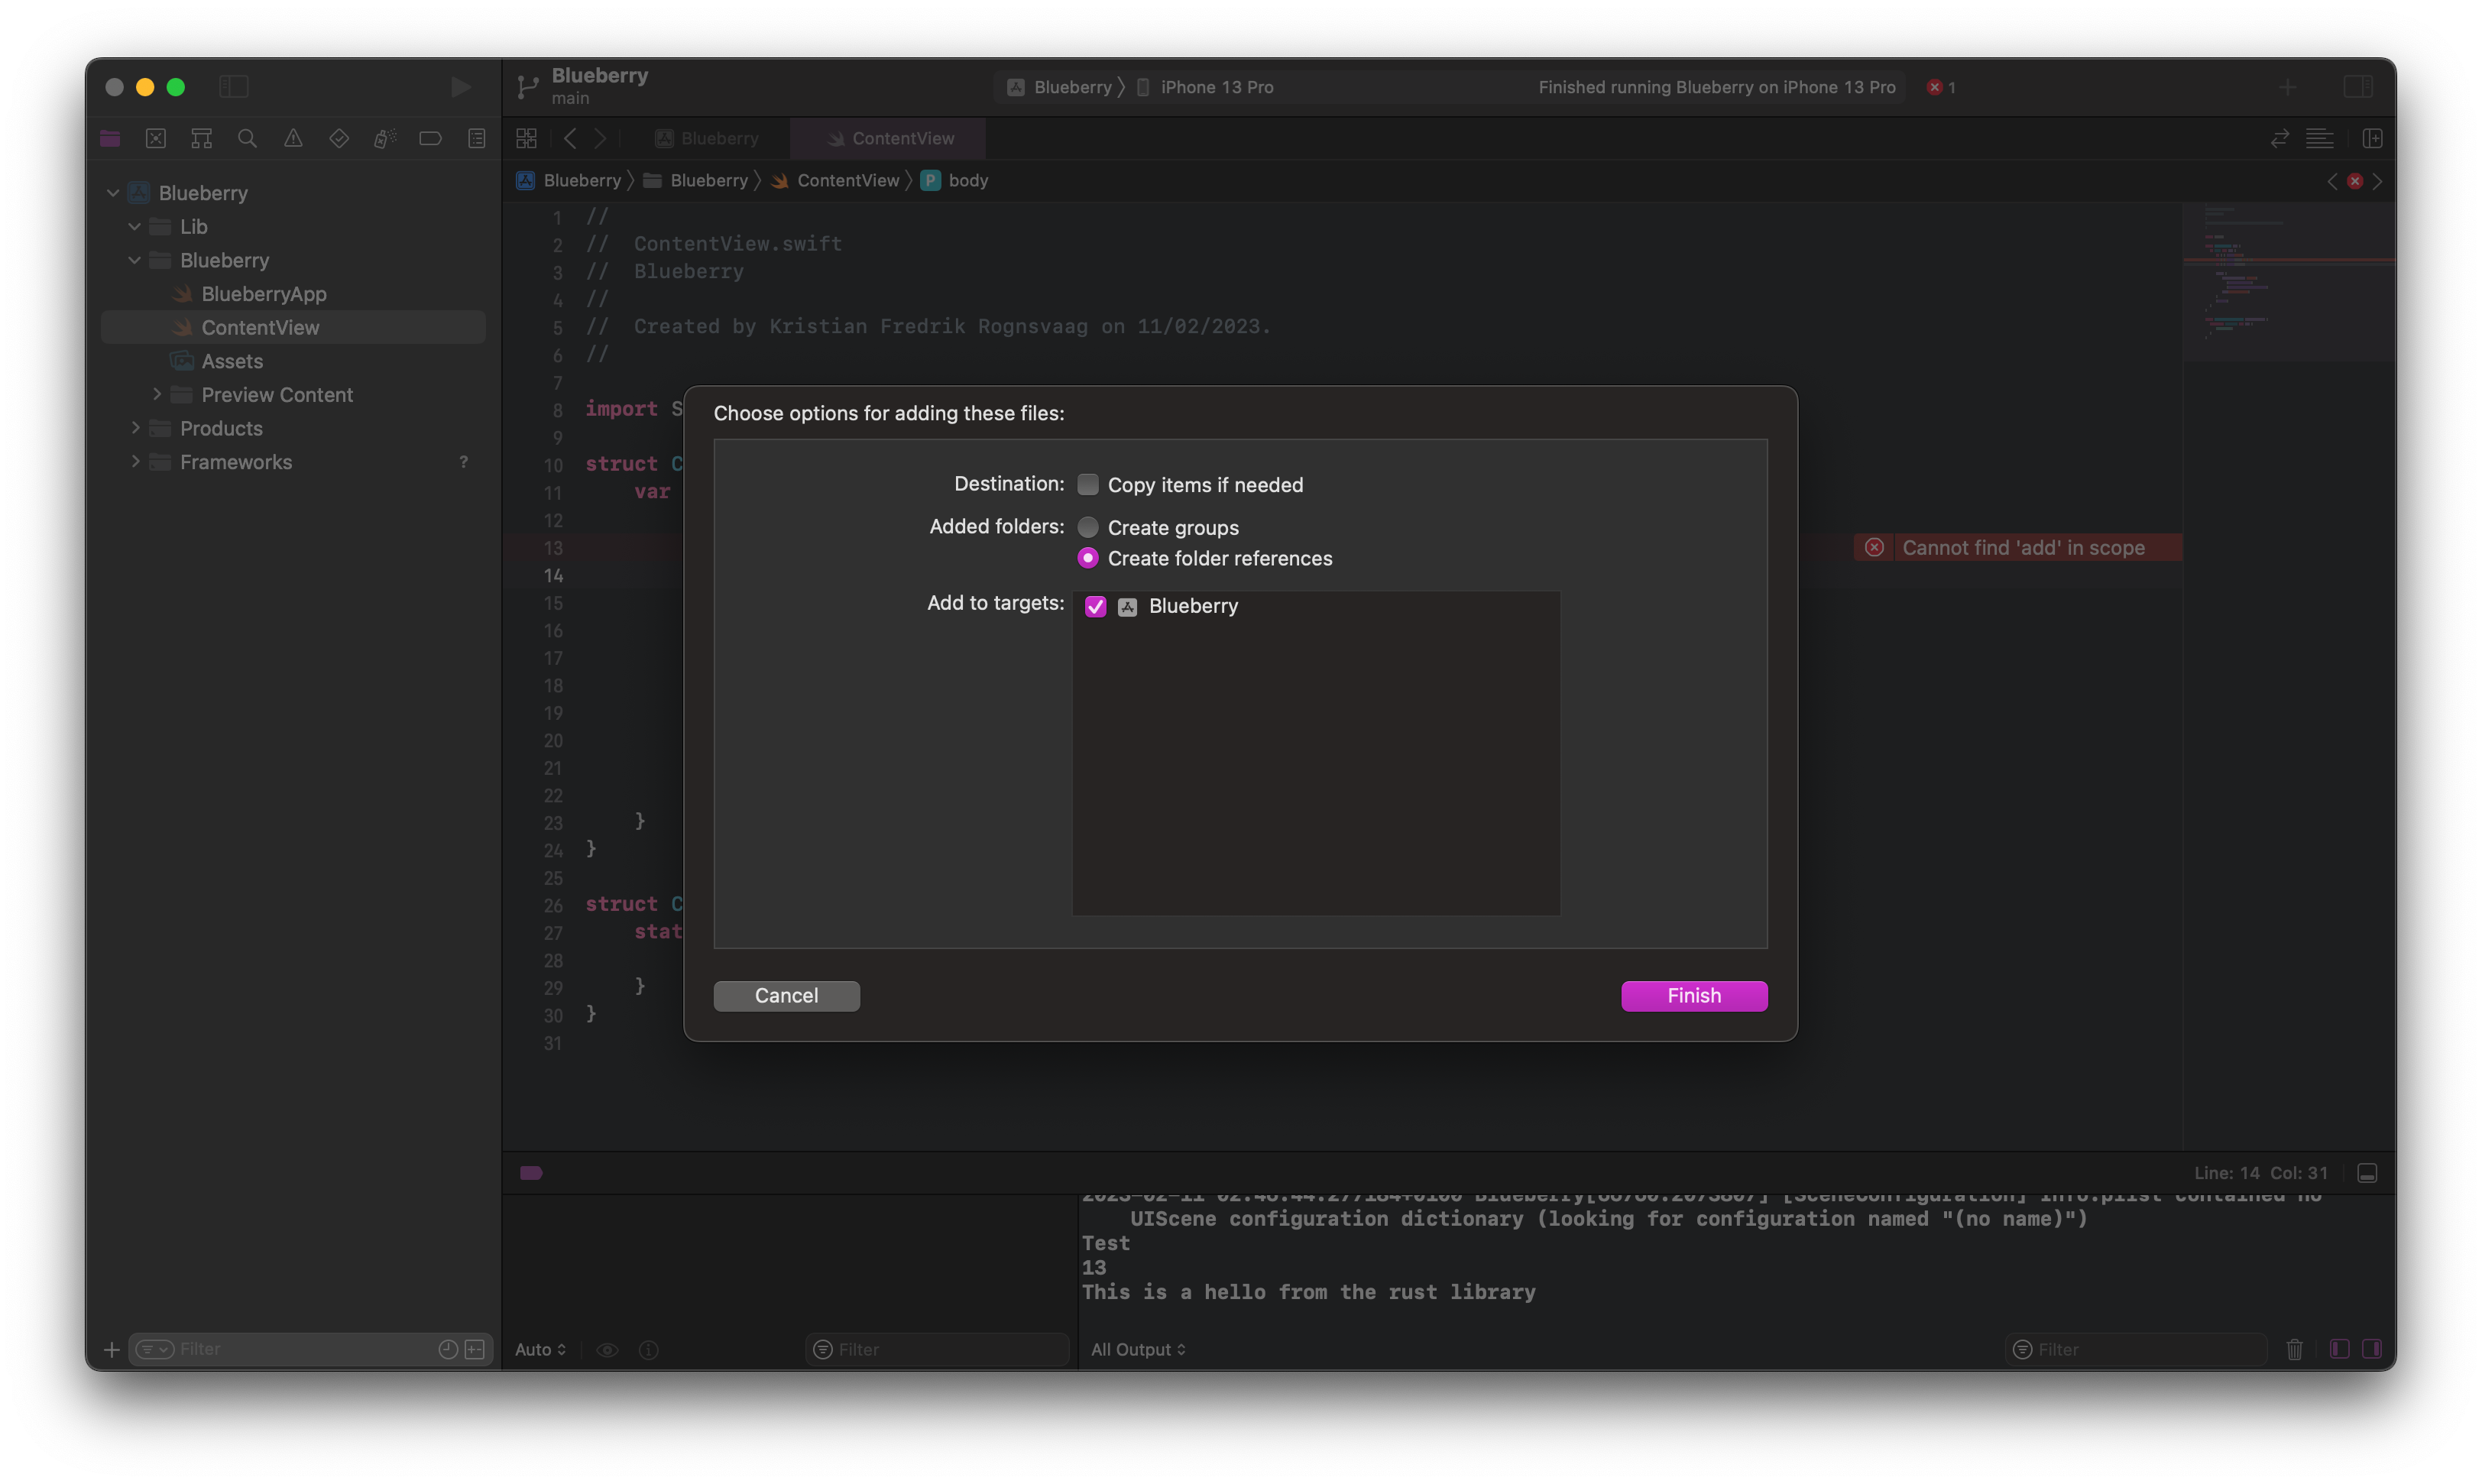
Now that we have gotten a successful build of our project we can start to use it! First go to "ContentView" and paste these lines.
Swift
let _ = print("Test")
let _ = print(add(a: 6, b: 7))
let _ = print(hello())
You can see in the image where you should paste the code, and you can also see in the log in the bottom right that the app printed the results from the rust library! We did it!
Addendum
If you want to go the extra step of making a swift package instead of just dragging your XCFrameworks and interface file into Xcode, this is how you do it.
First make a new folder in your rust library folder named something like "BlueberryLib" or "BlueberryPackage" for my example of the "Blueberry" iOS project. Then make a file named "Package.swift" in that folder. It should have something similar to this.
Swift
Package.swift
// swift-tools-version:5.6
import PackageDescription

let package = Package(
    name: "BlueberryLib",
    platforms: [
        .iOS(.v15)
    ],
    products: [
        .library(
            name: "BlueberryLib",
            targets: ["BlueberryLib"])
    ],
    dependencies: [
    ],
    targets: [
        .target(
            name: "BlueberryLib",
            dependencies: [
                .byName(name: "BlueberryCore")
            ],
            path: "Sources/"
        ),
        .binaryTarget(
            name: "BlueberryCore",
            path: "artifacts/BlueberryCore.xcframework"
        ),
    ]
)
I chose the name "BlueberryLib" as the name for my package. My source for the swift package structure was this article, so read through it yourself if you want more info.
Then make a folder inside the swift package named "artifacts", and move your XCFrameworks into the "artifacts" folder.
Then make a folder inside the swift package named "Sources" with a sub-folder named the same as the package inside.
You can then make a new shell script called make.sh. It should have something similar to this.
Bash
make.sh
# Env
UDL_NAME="blueberry"
FRAMEWORK_NAME="BlueberryCore"
SWIFT_INTERFACE="BlueberryLib"

# Compile the rust
cargo build --target aarch64-apple-ios
cargo build --target aarch64-apple-ios-sim
cargo build --target x86_64-apple-ios

# Remove old files if they exist
IOS_ARM64_FRAMEWORK="$FRAMEWORK_NAME.xcframework/ios-arm64/$FRAMEWORK_NAME.framework"
IOS_SIM_FRAMEWORK="$FRAMEWORK_NAME.xcframework/ios-arm64_x86_64-simulator/$FRAMEWORK_NAME.framework"

rm -f "$IOS_ARM64_FRAMEWORK/$FRAMEWORK_NAME"
rm -f "$IOS_ARM64_FRAMEWORK/Headers/${UDL_NAME}FFI.h"
rm -f "$IOS_SIM_FRAMEWORK/$FRAMEWORK_NAME"
rm -f "$IOS_SIM_FRAMEWORK/Headers/${UDL_NAME}FFI.h"

rm -f target/universal.a
rm -f include/ios/*

# Make dirs if it doesn't exist
mkdir -p include/ios

# UniFfi bindgen
cargo run --bin uniffi-bindgen generate "src/$UDL_NAME.udl" --language swift --out-dir ./include/ios

# Make fat lib for sims
lipo -create \
    "target/aarch64-apple-ios-sim/debug/lib${UDL_NAME}.a" \
    "target/x86_64-apple-ios/debug/lib${UDL_NAME}.a" \
    -output target/universal.a

# Move binaries
cp "target/aarch64-apple-ios/debug/lib${UDL_NAME}.a" \
    "$IOS_ARM64_FRAMEWORK/$FRAMEWORK_NAME"
cp target/universal.a \
    "$IOS_SIM_FRAMEWORK/$FRAMEWORK_NAME"

# Move headers
cp "include/ios/${UDL_NAME}FFI.h" \
    "$IOS_ARM64_FRAMEWORK/Headers/${UDL_NAME}FFI.h"
cp "include/ios/${UDL_NAME}FFI.h" \
    "$IOS_SIM_FRAMEWORK/Headers/${UDL_NAME}FFI.h"

# Move swift interface
sed "s/${UDL_NAME}FFI/$FRAMEWORK_NAME/g" "include/ios/$UDL_NAME.swift" > "include/ios/$SWIFT_INTERFACE.swift"

rm -f "$SWIFT_INTERFACE/Sources/$SWIFT_INTERFACE/$SWIFT_INTERFACE.swift"
cp "include/ios/$SWIFT_INTERFACE.swift" \
    "$SWIFT_INTERFACE/Sources/$SWIFT_INTERFACE/$SWIFT_INTERFACE.swift"

rm -rf "$SWIFT_INTERFACE/artifacts/*"
cp -R "$FRAMEWORK_NAME.xcframework" "$SWIFT_INTERFACE/artifacts"
Then you should replace the script in the Xcode "Run Script" build phase. It should be:
Bash
set -e

# Project path
RUST_PROJ="/Users/kf/code/ios/rust-test/blueberry"

# Binary paths
PATH="$PATH:/Users/kf/.cargo/bin" # Adds the rust compiler
PATH="$PATH:/opt/homebrew/bin" # Adds swiftformat to the path

# Make
cd "$RUST_PROJ"
./make.sh
Your BlueberryLib folder should look something like this.
After that you can remove the old BlueberryLib.swift file from the "Lib" folder, and remove the
BlueberryCore.xcframework entry from the "Frameworks, Libraries, and Embedded Content" list in the
"General" tab in the Xcode settings.
After that you can drag the new BlueberryLib folder into the
"Lib" folder in Xcode. Then you add it to the "Frameworks, Libraries, and Embedded Content" list just
as you did before. After that you can just import the library in Swift with a standard import
statement like import BlueberryLib, and that should be it. You're done!